Emergency Command Centre (EOC)

Emergency Operations Centres (EOCs)

Emergency Command Centre (EOC)

What is an Emergency Operation Centre?

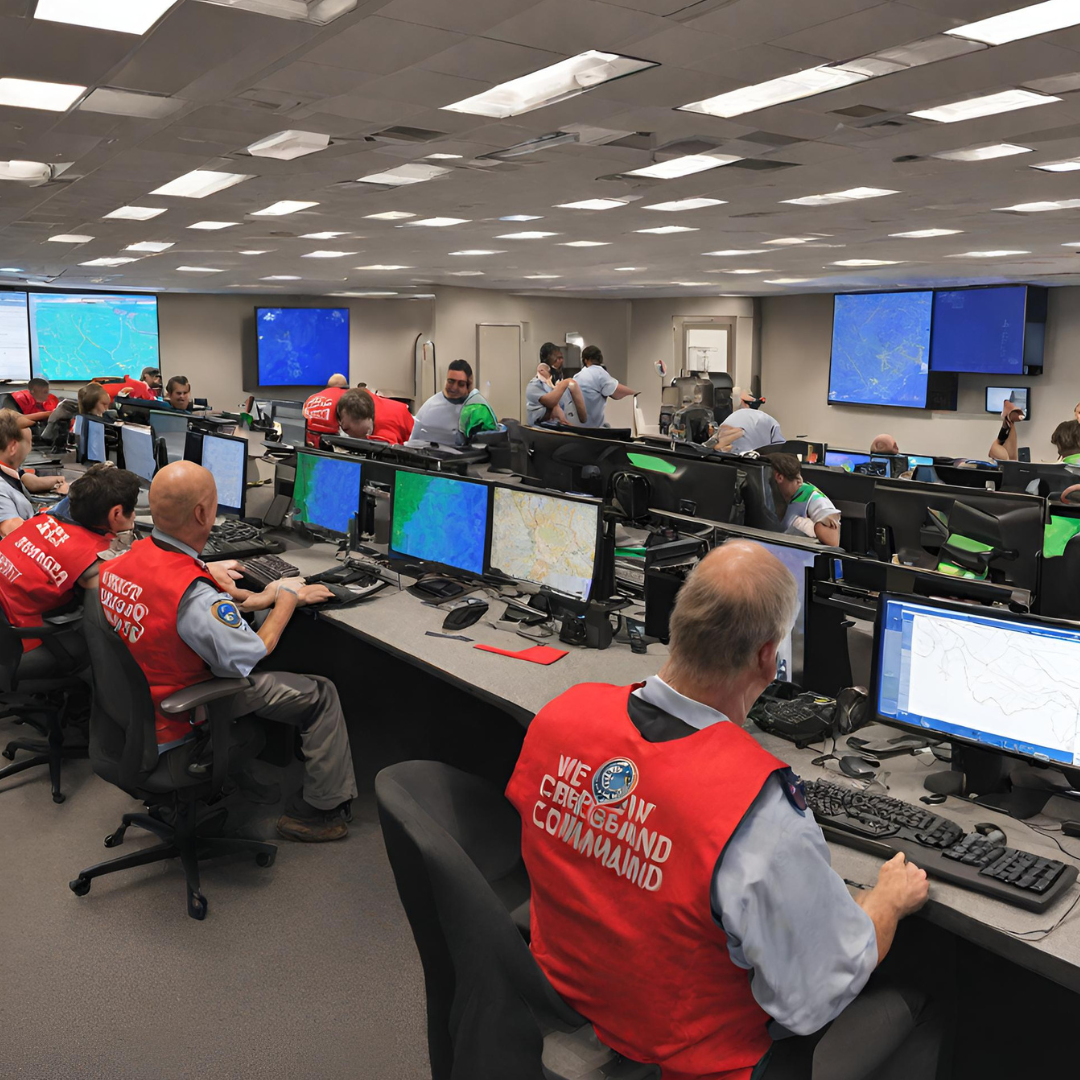
The Emergency Operations Centre (EOC) serves as the central hub for coordinating emergency response and recovery efforts during incidents. While the Incident Command Post (ICP) manages tactical on-scene operations, the EOC assists by supporting and coordinating ICP activities along with other incident operations.

Typically, Emergency Operations Centres (EOCs) are activated upon the request of the Incident Commander or senior municipal officials. Their primary purpose is to provide comprehensive jurisdictional direction, control, coordination, and resource support during emergencies. It’s advisable for an EOC to adhere to the principles outlined in the British Columbia Emergency Response Management System (BCERMS) for organizing and managing its operations and activities. Utilizing the five functional elements of BCERMS enables an EOC to operate more effectively and align consistently with regional and provincial counterparts.

In situations where an EOC has depleted its resources or requires coordination beyond its jurisdiction, it usually turns to the Provincial Regional Emergency Operations Centre (PREOC) for support.

What are the 5 Sections in which the EOC is structured?

Operating under the Incident Command System (ICS), the EOC is structured into five distinct sections to effectively manage operations:

  1. Management: This section, overseen by the EOC coordinator, holds overall responsibility for directing and managing all EOC activities. It focuses on strategic decision-making, implementation, and review, ensuring alignment with the directives of the Emergency Planning Group (EPG).
  2. Operations: Representing on-scene emergency responders, this section facilitates coordination between the EOC and field operations, including the ICP.
  3. Planning and Intelligence: Responsible for receiving, evaluating, and analyzing disaster information, this section provides updated status reports to EOC management and field operations. It also conducts damage assessment and develops specialized technical assessments.
  4. Logistics: Tasked with procuring necessary supplies, personnel, and material support for emergency responses. This section handles functions such as personnel call-out, equipment acquisition, lodging, transportation, and food provision.
  5. Finance and Administration: This section manages cost accountability, purchase authorizations, documentation, and risk assessment.

Each EOC section is further organized into units and branches to fulfill specific functions. These sections are overseen by appointed chiefs who report directly to the EOC coordinator or the campus emergency director. The activation of functions within each section depends on the scale and nature of the incident at hand.

Other Roles of the Emergency Operations Centre

The EOC doesn’t directly oversee on-scene response efforts, but it fulfills crucial support roles by:

  1. Gathering, assessing, and distributing incident information, including public alerts and notifications.
  2. Analyzing jurisdictional impacts, maintaining maps and display boards, and establishing priority actions.
  3. Handling requests, acquiring, and managing the use of resources.
  4. Coordinating and communicating with federal, provincial, local governments, and other involved agencies.
  5. Developing plans for ensuring the continuity of government operations.

Conclusion

In conclusion, Emergency Operations Centers (EOCs) play an indispensable role in ensuring effective emergency response and recovery efforts. Serving as centralized hubs for coordination, communication, and resource management. By harnessing the principles of collaboration, adaptability, and strategic planning, EOCs not only enhance the resilience of communities but also foster a coordinated approach among those in emergency management. As frontline defenders against crises, EOCs stand as beacons of preparedness and unity, safeguarding lives, property, and the well-being of society at large.

For more information on Emergency Operations in action, you can check out this video from the Okanagan Operations Centre in action.


New Water Storage Tank

We are pleased to announce we have a new water storage tank

These tanks are an incredible solution for both homes and organizations, giving schools, hospitals, and fire halls enough water for around 75 people for 72 hours (at 4 liters each), or around 150 people if only drinking water is provided (2 liters each).

Features:

  • Slim footprint: tanks fit through an average doorway, without sacrificing volume.
  • One-piece, seamless construction: increased durability and longevity.
  • Fittings included: high-quality brass hose fittings with shut-off valve included.
  • Food-grade standards: safe for potable water or other consumables.
  • 909L or 240 g: 2 months of water for a family of 4 (at 4 liters each, per day.)
  • Please don’t freeze: vented cap allows for some expansion and contraction in freezing temperatures, but freezing contents may cause ruptures.
  • Made in Canada 🍁

Protecting Your Home: The Vital Role of Water Storage Tanks

Water intrusion poses a significant threat to homes, often damaging foundations and exterior walls. In the face of flooding or plumbing issues, your home’s water supply system can be jeopardized. However, a viable solution exists in the form of water storage tanks, which act as a protective barrier between the water supply and the vulnerable exterior. In times of flooding, these tanks retain water, preventing it from infiltrating your home. Common culprits of water intrusion include faulty plumbing, roof and wall leaks, and failures in the water supply system.

Ensuring Safe Drinking Water

Perhaps the most crucial benefit of water storage tanks lies in safeguarding your home’s drinking water. Given water’s indispensability to life, protecting it becomes paramount. Water storage tanks provide layers of protection, ensuring that the water within remains clean and safe for consumption without the need for chemical additives. It is recommended to have 4 liters of water on hand, per person, each day, in case of an emergency. This includes water for drinking, cooking, and sanitation.  At Total Prepare, our 909 liter water tank is enough water to last a family of 4 people two months, if using 4 liters, per person, per day. Many people may find that 4 liter figure restrictive, especially if you need to clean dishes, wash children, or need water for first aid. Even with a 4 liter ration, the amount of stored water adds up fast.

Additional Benefits of Water Storage Tanks

Beyond emergency preparedness, water storage tanks offer a multitude of additional benefits. They enable you to fill up during regular times and serve as a reliable water source during power outages or when local water plants are incapacitated due to natural disasters. With a lifespan extending over decades, these tanks provide long-term assurance, sparing you the concern of imminent replacements.

In Conclusion

In conclusion, water storage tanks are indispensable assets that ensure your family’s access to clean water during emergencies while fortifying your property’s value in times of economic instability. Their multifaceted benefits make them an integral component of any comprehensive disaster preparedness plan. Investing in a water storage tank not only safeguards against potential water-related damages but also grants peace of mind in the face of unforeseen challenges.


Want to learn more?  Check out our water tank page.

Warming Centre

Warming Centres: a haven in Canadian Winters

Warming Centre

Introduction

In the cold Canadian Winters, warming centres are a inviting option for many people.  With an average temperature of -15 Celsius, vulnerable Canadians struggle to find warmth during the winter months.  Cold temperatures use up your body’s stored energy. A body temperature that is too low affects the brain, making you unable to think clearly or move well.  Dangers associated with  extremely cold temperatures in include hypothermia and frostbite.

The History of Warming Centres

Although, humans have always sought warmth from the cold, and offered shelter to others, the beginning of the term warming centre is believed to have been started at the end of World War II.  In 1945 in Berlin, much of the city was destroyed and there was a lack of resources and organization.  Blankets and warm clothing was distributed, and plans were made to develop public “warming centres” to support the population.  Since then, shelters for warmth have become more common.  Many North American cities gradually adopted this concept as their vulnerable population grew.

Locations of Warming Centres

Cities that are in a constantly cold climate area usually always have warming centres available throughout the winter. If a town or city is in a more mild climate, they may open warming centres as cold weather is present or forecast.  There is currently not a Canada wide map of all locations, but an online search of your local area should provide locations and availability for those in need.

Benefits for the vulnerable

Warming shelters can provide a variety of services and comforts for people dealing with extreme cold.  These services can include:

  • shelter for people and possibly pets
  • food and warm drinks
  • bathroom facilities
  • winter mitts, toques, and clothing

Are Warming Centres for everyone?

Each warming centre will have it’s own criteria for who is welcome to com, therefore some barriers could be:

  • having pets
  • mental illness
  • criminal backgrounds

Some people would simply rather deal with the cold in their own way, and refuse to go to a warming centre even if available.  What are the alternatives for vulnerable people who are restricted or unwilling to be in a warming shelter?


At Total Prepare, we have put together a Humanitarian Winter Kit designed for people without access to public centres. It includes essential items like a waterproof HeatStore reflective sleeping bag, a -20C sleeping bag, socks, hand warmers, mittens, toque along with other helpful items.


72 hour kit

72-Hour Emergency Kit: What should it include?

We often do not like to think about the chance that a natural disaster could affect our community, but those who fail to plan ahead are the ones that are affected the worst when problems arise. A 72 hour kit is a basic tool you can use to keep your family protected while you wait for help after a serious emergency situation.

In the event of a disaster, having a 72 hour kit could mean the difference between survival and destruction, yet few households have taken the time to invest in one of these. With just a little bit of forward thinking, you can be prepared for whatever nature throws your way.

A 72 hour kit is designed to give your family the means with which to survive for three days after a serious natural disaster. In most cases, this is enough time for you to be rescued or to evacuate to safer areas. So, the items in the kit are items for your basic survival. For a more comprehensive read on further ways to be prepared, check out the Government of Canada Get Prepared page.

Want a quick refence for  what a 72 emergency kit should contain?  Click the image below to take a closer look at our infographic:Emergency Kit Infographic


4 Key Categories to pack in a 72 Hour Emergency Kit:

Essentials for Survival

  • First Aid Kit: The first item to pack in your 72 hour emergency kit is a well-stocked first aid kit. It should include bandages, antiseptic wipes, adhesive tape, scissors, tweezers, pain relievers, and any prescription medications you or your family members may need. Make sure to regularly check the kit for expired items and replace them.
  • Flashlights and Batteries: Having a reliable source of light is crucial during emergencies, especially when the power goes out. Include high-quality flashlights with extra batteries to ensure you can see and navigate in the dark.
  • Multi-Tool or Swiss Army Knife: A multi-tool can be incredibly handy for a variety of tasks, from opening canned food to cutting rope. It’s a versatile tool that can serve multiple purposes.
  • Hygiene Supplies: Maintaining personal hygiene is important for your overall well-being. Pack items like soap, toothbrushes, toothpaste, toilet paper, and sanitary supplies to stay clean and comfortable.
  • Emergency Blankets: These compact, lightweight blankets are designed to retain body heat, providing warmth during cold nights. They are an excellent addition to your kit for maintaining core body temperature.

Food and Water Supplies

  • Non-Perishable Food: Select a variety of non-perishable food items such as canned goods, energy bars, dehydrated meals, and nut butter. Aim for items with a long shelf life and those that don’t require cooking or refrigeration.
  • Water: Adequate hydration is crucial for survival in a 72 hour emergency kit. Pack at least one gallon of water per person per day, and don’t forget a portable water filter or purification tablets in case you need to collect water from natural sources.
  • Cooking Supplies: If possible, include a portable camping stove, fuel, and cookware for heating food and boiling water. This can be particularly useful in situations where you have access to shelter but no power.
  • Eating Utensils: Lightweight, durable utensils and dishes should be included to make eating and drinking easier and more sanitary.

Clothing and Shelter for a 72 Hour Emergency Kit

  • Weather-Appropriate Clothing: Pack extra clothing suitable for the climate in your region. This may include warm layers, waterproof jackets, sturdy shoes, and a change of underwear. Don’t forget to include items like hats and gloves for added protection.
  • Tents or Tarps: Shelter is essential for protection from the elements. Include a small tent or durable tarps and cordage for creating makeshift shelters.
  • Sleeping Bags or Blankets: To stay warm and comfortable during the night, include sleeping bags or additional blankets in your kit.
  • Hand Warmers: These small, disposable packets can provide much-needed warmth in cold conditions.

Communication and Safety Gear

  • Battery-Powered or Hand-Crank Radio: In emergencies, you’ll need to stay informed about the situation. A portable radio can help you receive important updates and information.
  • Cell Phone and Chargers: Keep a fully charged cell phone in your kit, along with portable chargers or solar chargers to maintain communication.
  • Whistle and Signal Devices: A whistle can be heard from a distance and is a great tool for signaling for help. Additionally, consider including signal flares or mirrors for long-range visibility.
  • Important Documents: Make copies of essential documents such as identification, insurance policies, medical records, and emergency contact information. Store them in a waterproof container within your kit.

In conclusion, building a 72-hour emergency kit is a critical step in your disaster preparedness plan. By including the essentials for survival, food and water supplies, clothing and shelter, and communication and safety gear, you can ensure that you and your family have the necessary resources to weather a crisis. Regularly review and update your kit to keep it current and effective, and don’t forget to personalize it to meet the specific needs of your household. Being prepared today can make all the difference in tomorrow’s emergency.


Looking for ready-to-go 72 hour emergency kits for you or your family?  Check out the wide variety of 72 Hour kits available at Total Prepare! Premium 72 hour Emergency Kit 1000px