Recovery After a Disaster
Disasters have a clear beginning and end, but recovery can last a long time after the dust settles. But how do we as individuals, families, and communities respond to the enormous upheaval that comes with a major emergency? How can we ensure that our homes and businesses are safe, our families are cared for, and that we’re asking for help in the right places? How do we help ourselves and those around us cope?
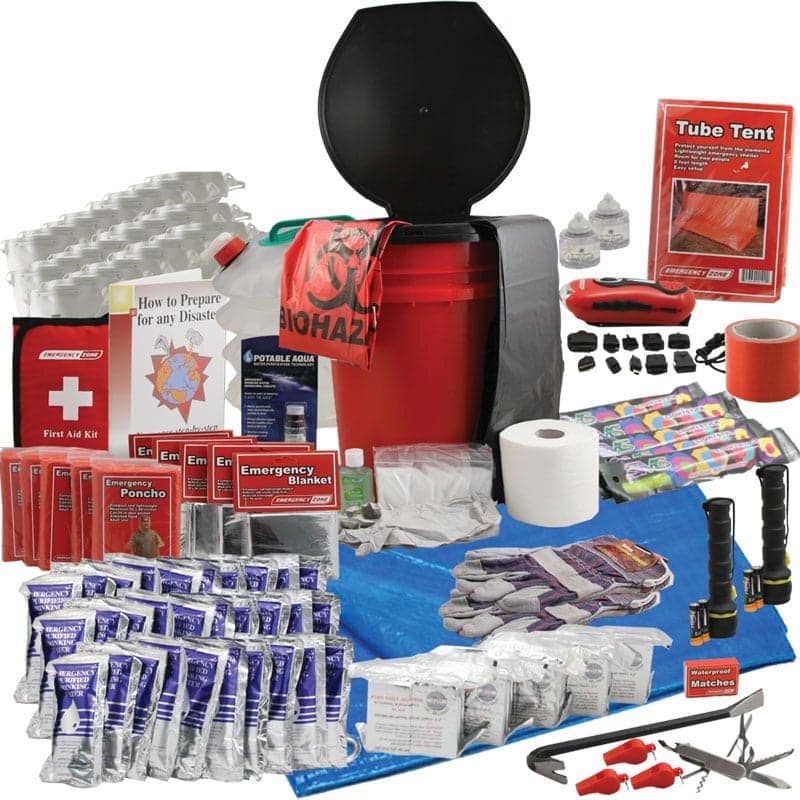
The smoke is clearing, the water is receding, and the ground is still. The threat, whatever it was, has passed. You have your kit, your family, and maybe a pet or two… now what?
Where to Start
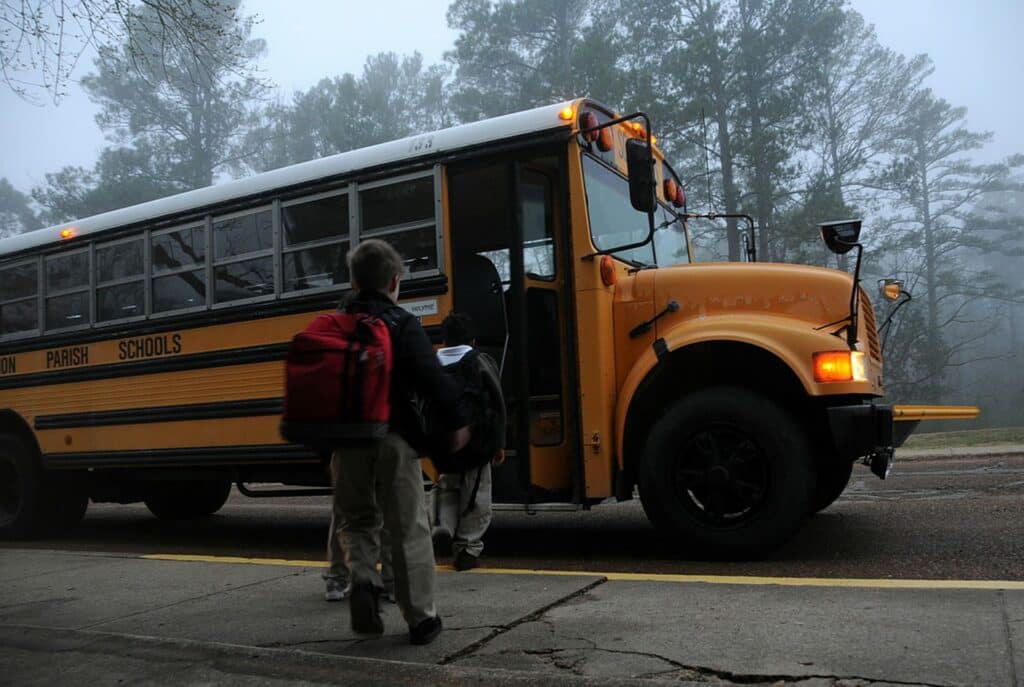
Keep your focus small at first and concentrate on taking care of your family. If you are not together at the time of the emergency, follow your emergency plan to meet up. If you did not have an emergency plan, or if something particularly unexpected happened, head to your home. In most cases school age children will be kept at the school building until a parent or guardian arrives, so if you have children, head straight to the school.
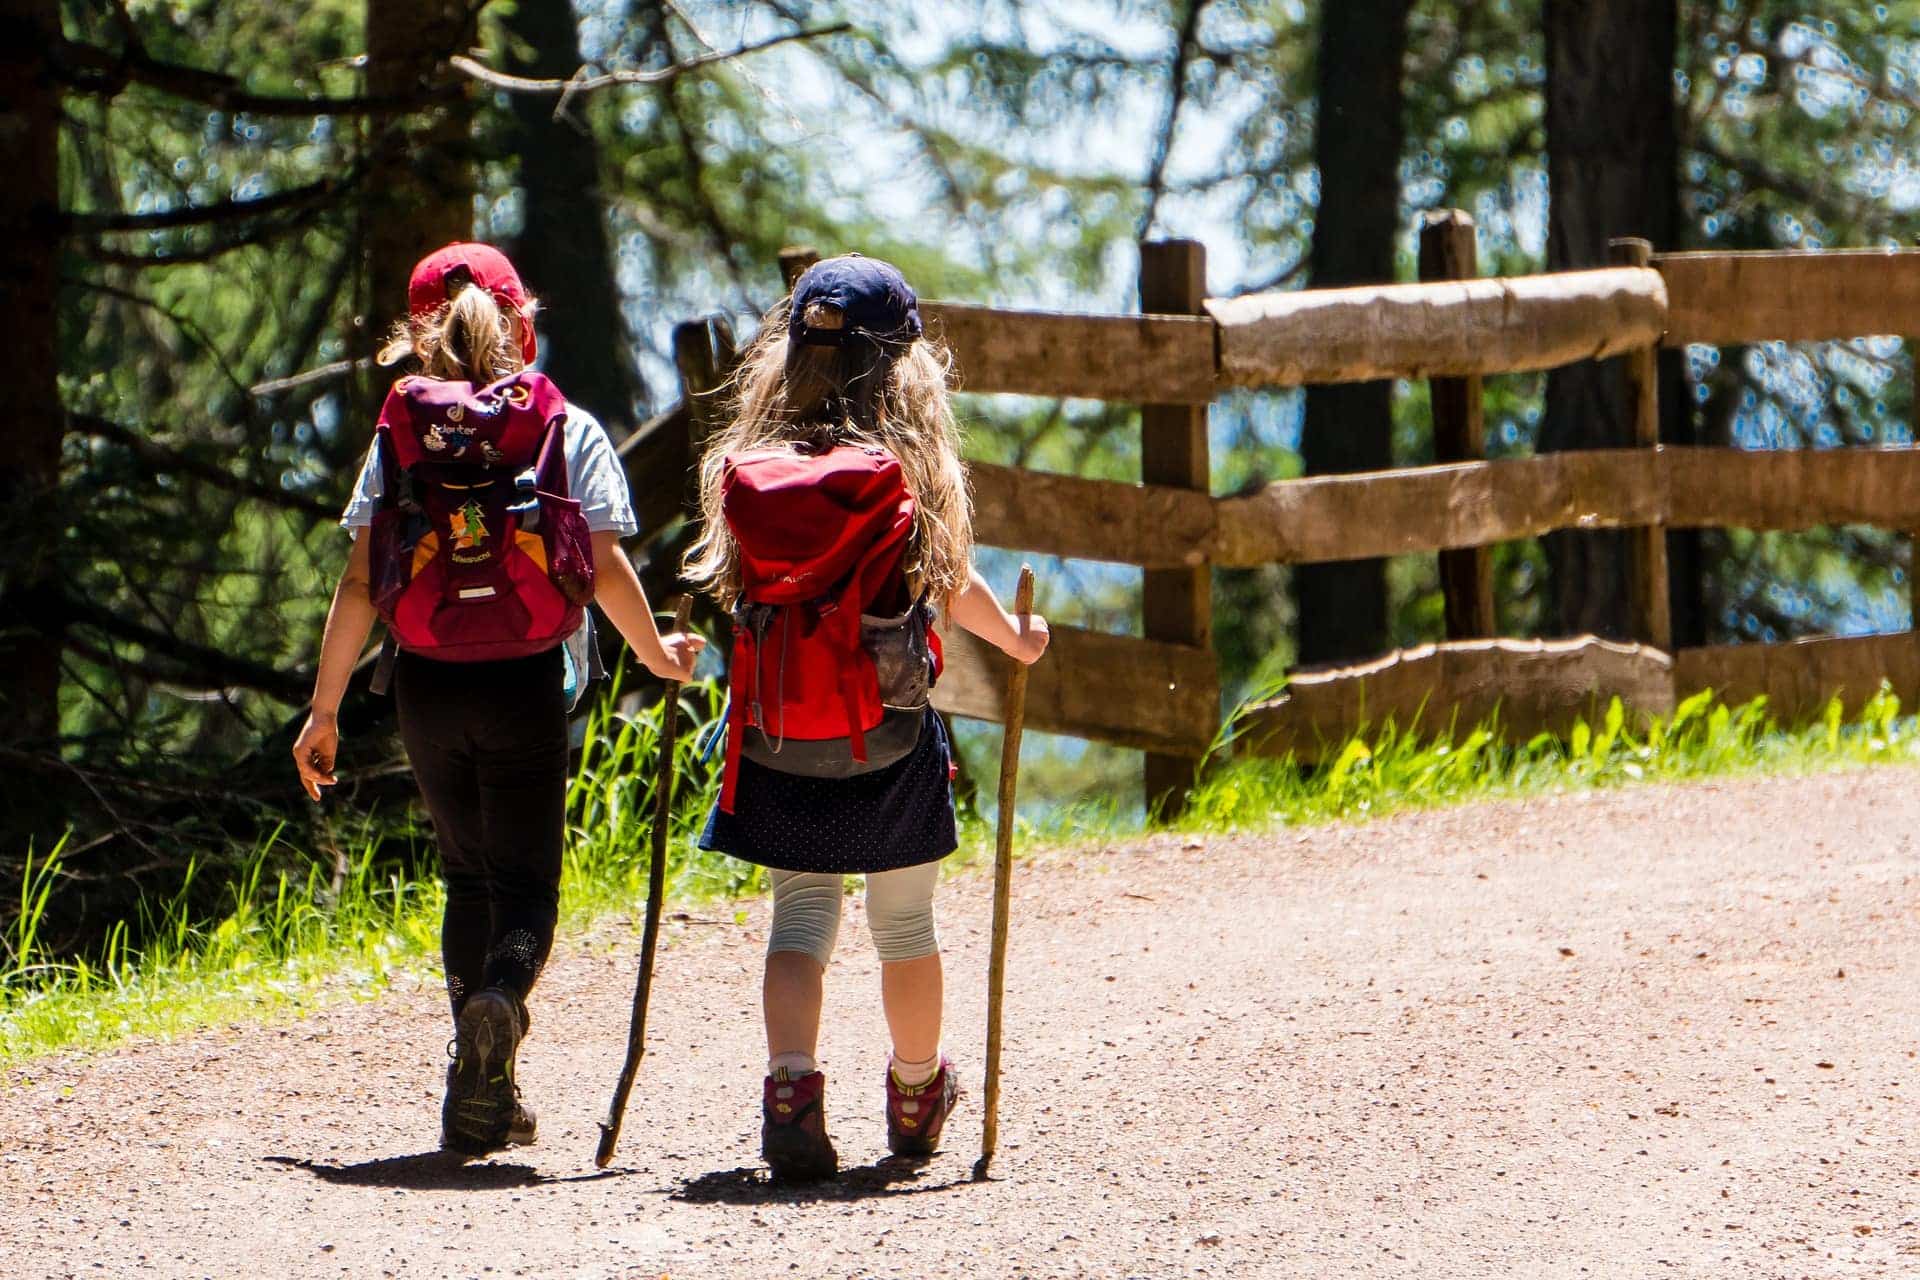
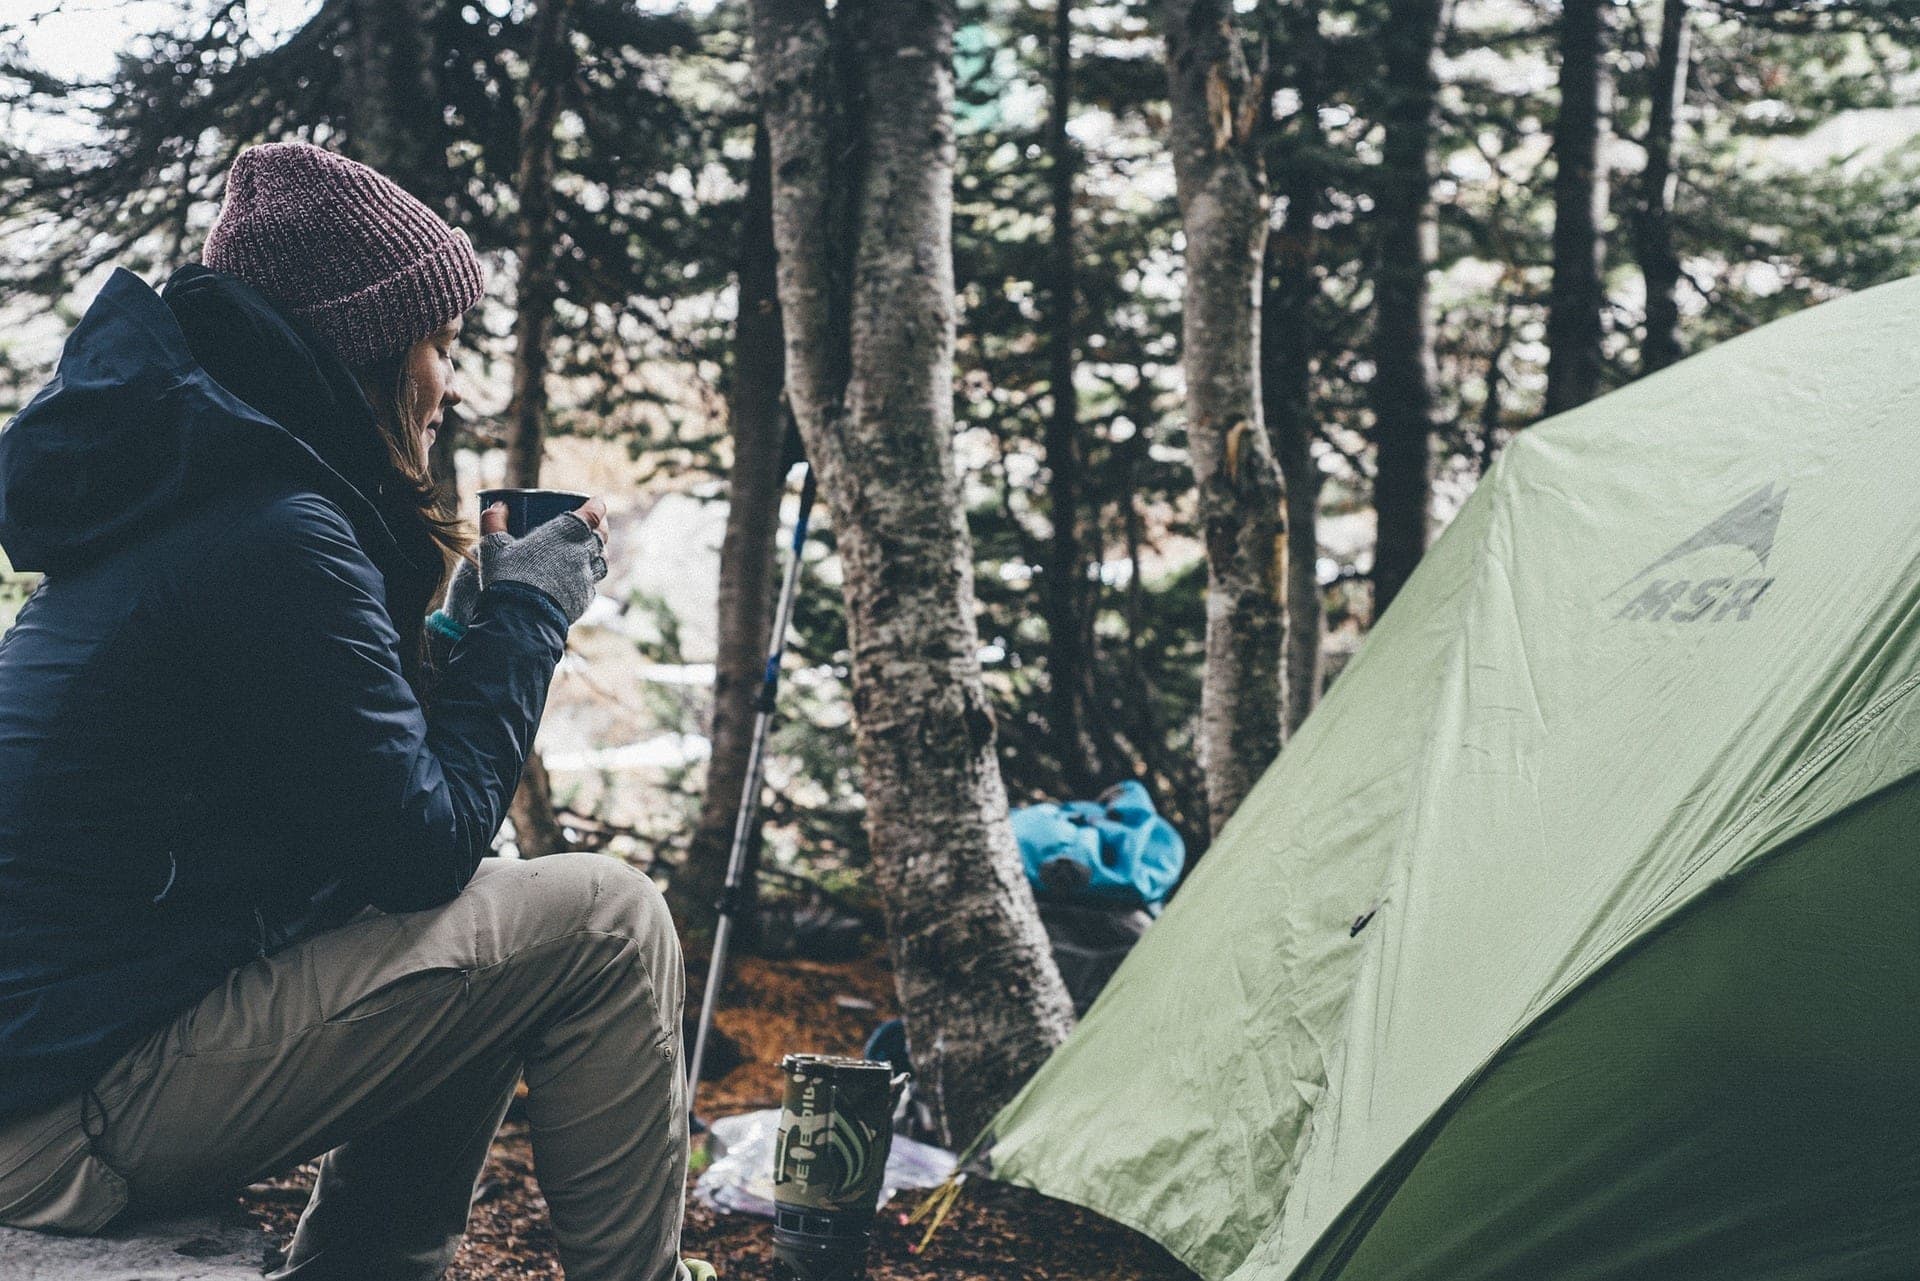
If you need to leave your home before everyone has returned, perhaps to take someone for medical care, or to get away from a fire, leave a note or signal for anyone else returning to let them know where to go. Only do this if it is safe. Let your neighbours know where you are going too, in case the note is not found.
Assess Your Resources
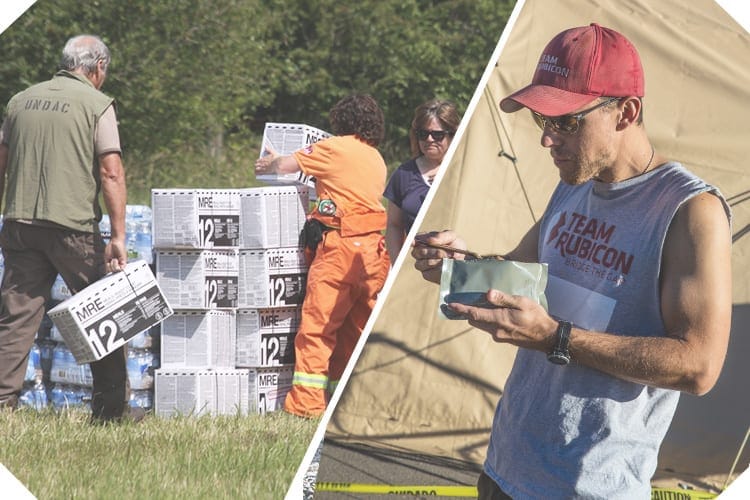
Once everyone is together and safe, look outward. If the emergency was far-reaching there should be recovery resources, or even a recovery centre. Keep an eye out for the following organizations:
- Emergency Social Services (ESS) volunteers are trained to support those in need through reception centres. They will also sometimes run group lodgings when other options are unavailable. Consider signing up with your local ESS organizations before an emergency to be a part of this essential service.
- Provincial Housing organizations (BC Housing for example) can usually provide cots and blankets and facilitate short- and long-term housing for evacuees.
- Canadian Red Cross offers family reunification services and collects donations for disaster relief.
- Salvation Army provides disaster relief and emotional support services.
- Provincial Disaster Financial Assistance may be available to owners of small businesses, home owners, tenants, farm operations, and not-for-profit organizations. These programs can assist with repairs and recovery from property damage related to a disaster. This is often only available if losses were not insurable, or if other programs are not available.
Promote Health and Routine
Recovering from an emergency is not just a financial process of rebuilding and gathering resources. Learning to cope, emotionally and mentally, is a massive component too. It can take years just to feel back to normal again after a major upheaval. It can be especially difficult for children to adjust.
As the situation allows, do your best to eat healthy meals, exercise, drink plenty of water, and get plenty of sleep. Achieving all of these goals can be challenging at the best of times, but all help to maintain strong health. Learn to recognize the signs of post-disaster stress in yourself and those around you. Talk over your experiences together, or with a professional if you are struggling. Show understanding and compassion whenever possible.
Returning to your old routines will also help things feel back to normal and can be especially beneficial for children and pets. Some things will likely be impossible but do what you can to find alternatives that fill a similar role. For example, schools may be closed but you might ask your child to read, or practice what they were learning before the upheaval.
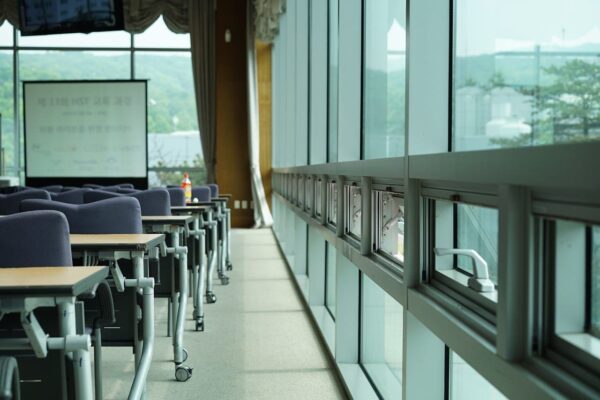
Attend any debriefing sessions happening in your community. These sessions provide opportunities to learn about resources, and often have support services present. They are a great place to ask any questions you may have about moving forward too.
Monitor your own health as well as those around you. If you need a break, take it. If you need help, ask for it. You are not a burden, and you’ll help them too when you are able. Stay with family and friends for a few days if possible to expand your social security net and support.
Coming Home
When you return home after an emergency, keep an eye out for animals in and around your home. Stray pets and wildlife will be unpredictable and potentially dangerous. Never try to approach, corner, or rescue a wild animal. If you find a dead animal, contact the authorities to ask for direction. Carcasses can be sources for disease so it is important to be cautious.
Keep a radio in your emergency kit or use the one in your car to monitor a local station. They’ll broadcast news and updates as they become available. This will also be one of the best places to learn about community gatherings, reception centres, or the path of a disaster (like a fire).
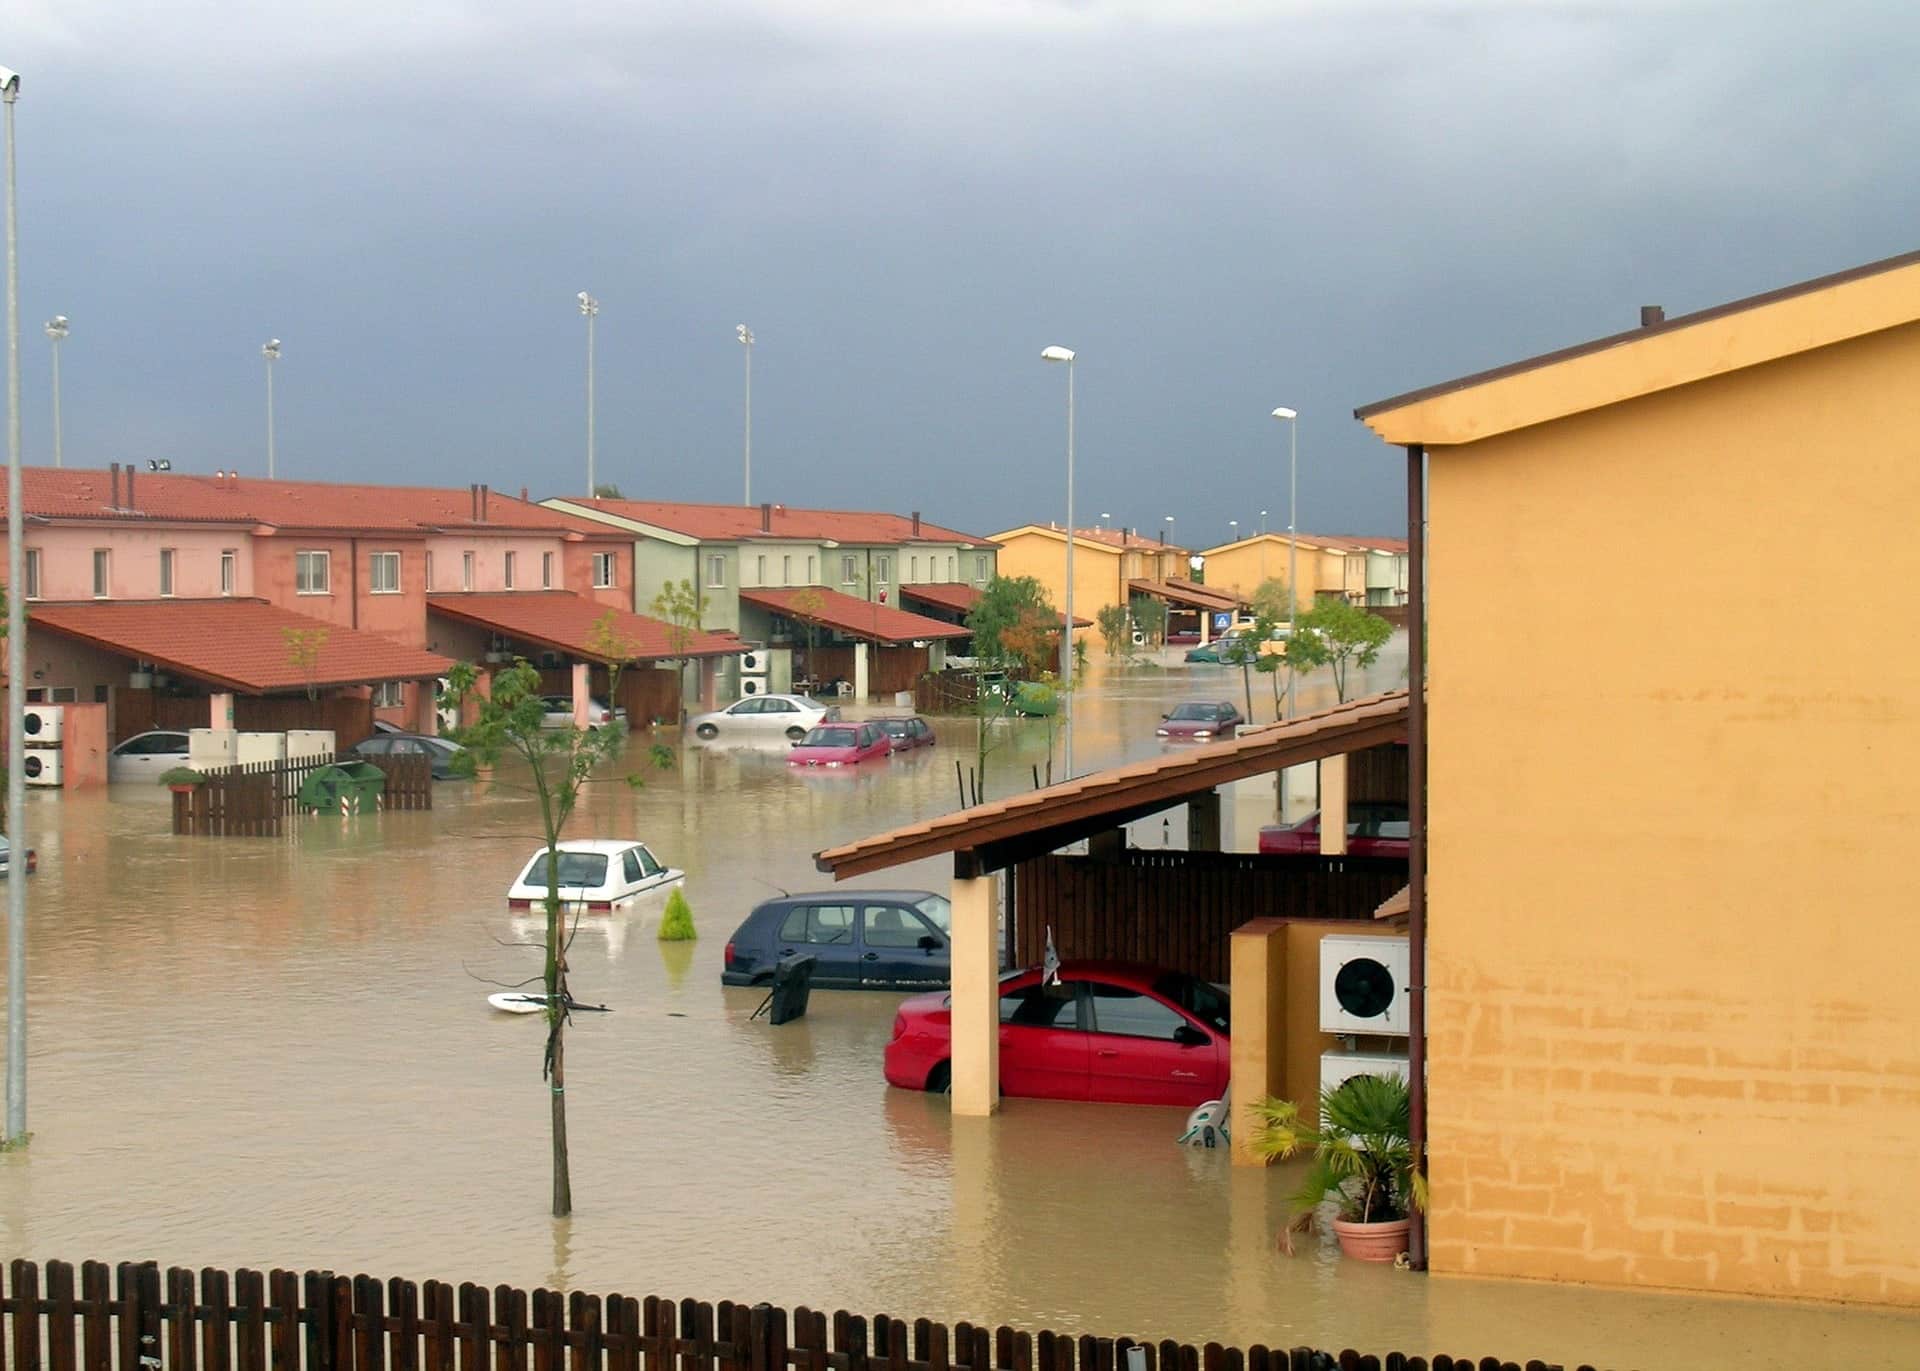
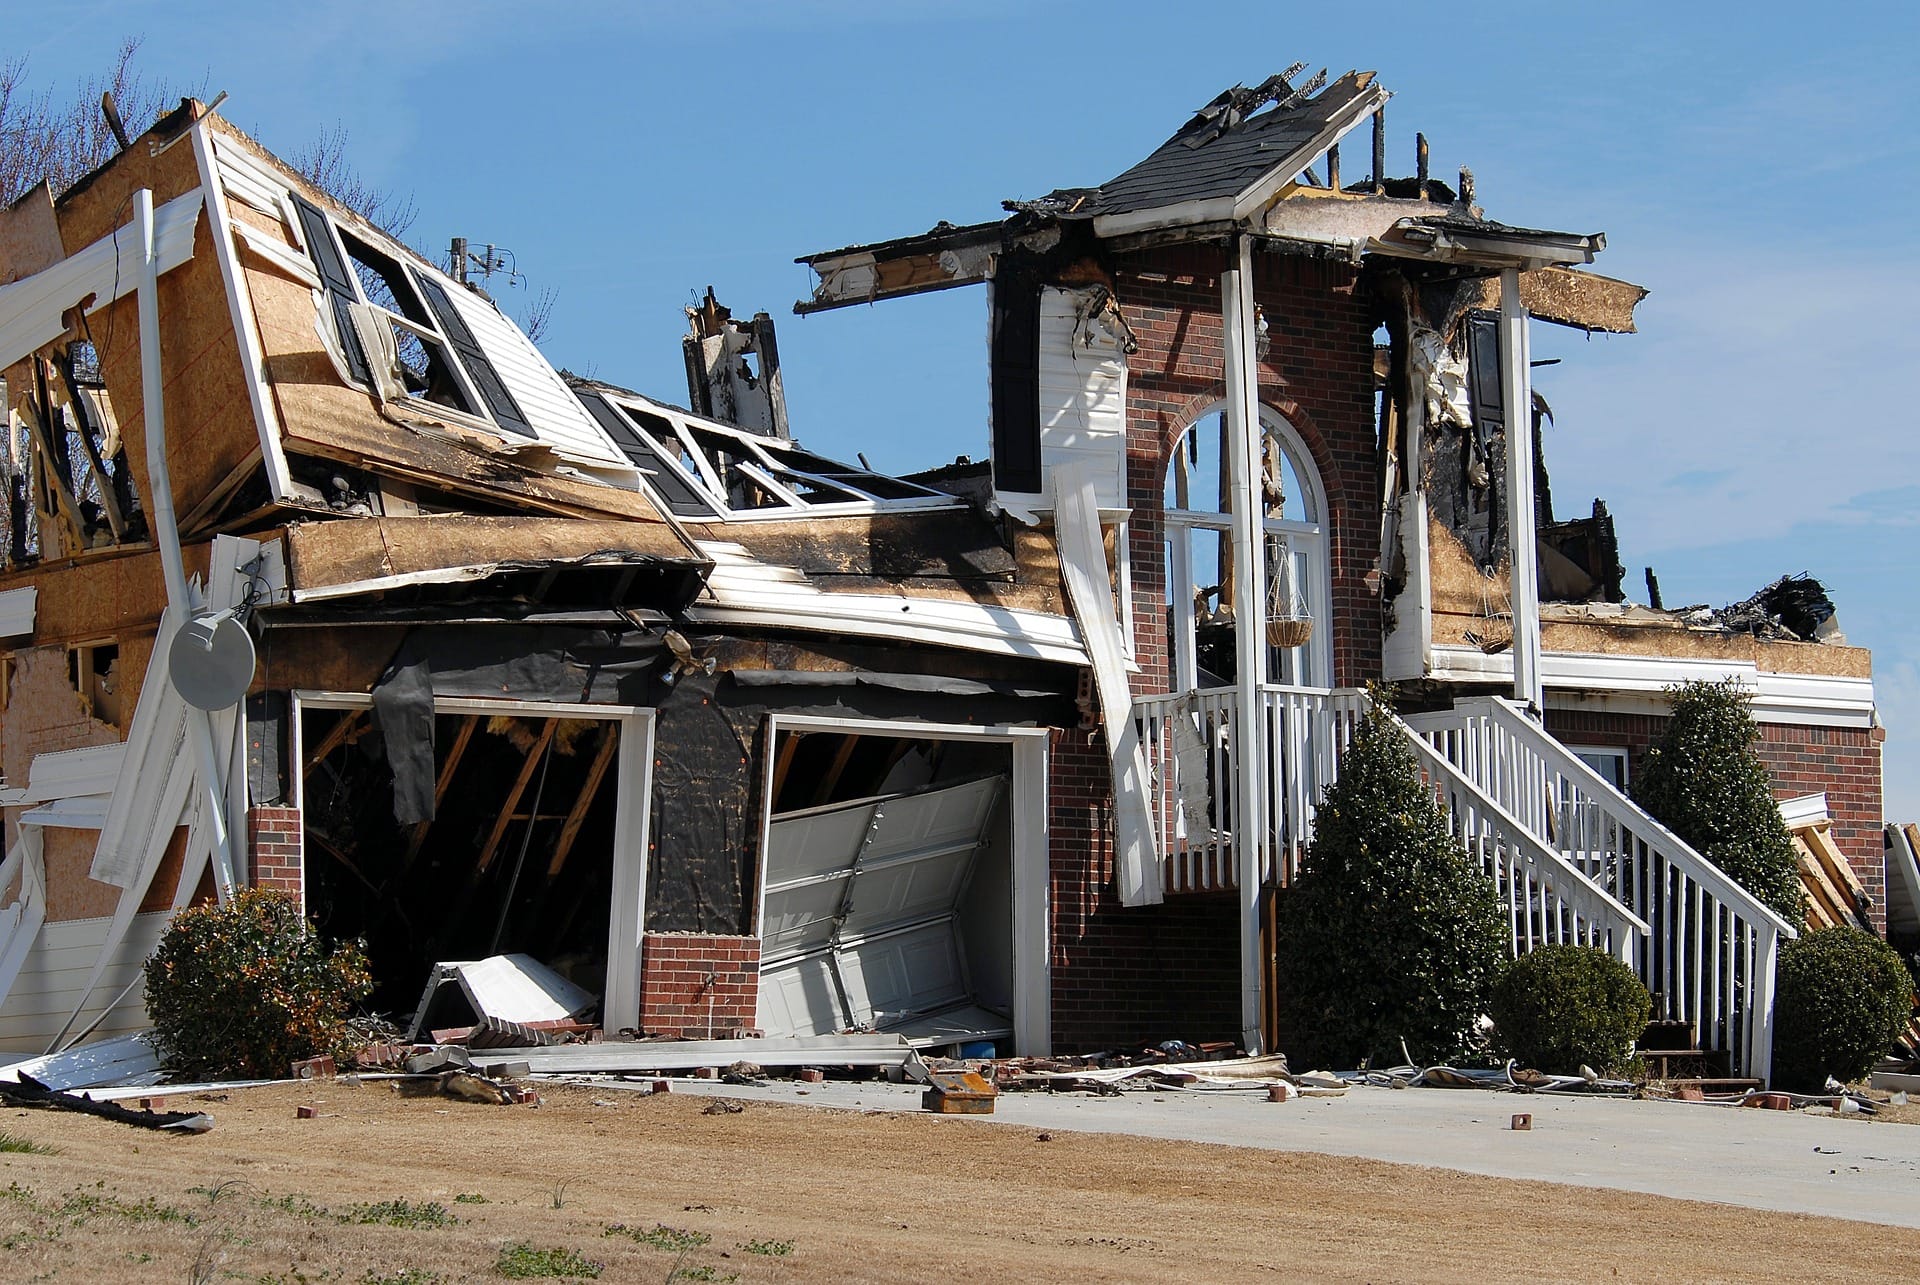
Walk around your home before entering and keep an eye out for hazards. Do not enter your home if you smell gas, if floodwater remains around the building, the home has shifted off its foundation (even if it’s only a little bit), or if there is fire damage. If you have any doubts about the safety of your home shelter in place until an inspector can make an assessment.
Assess Losses
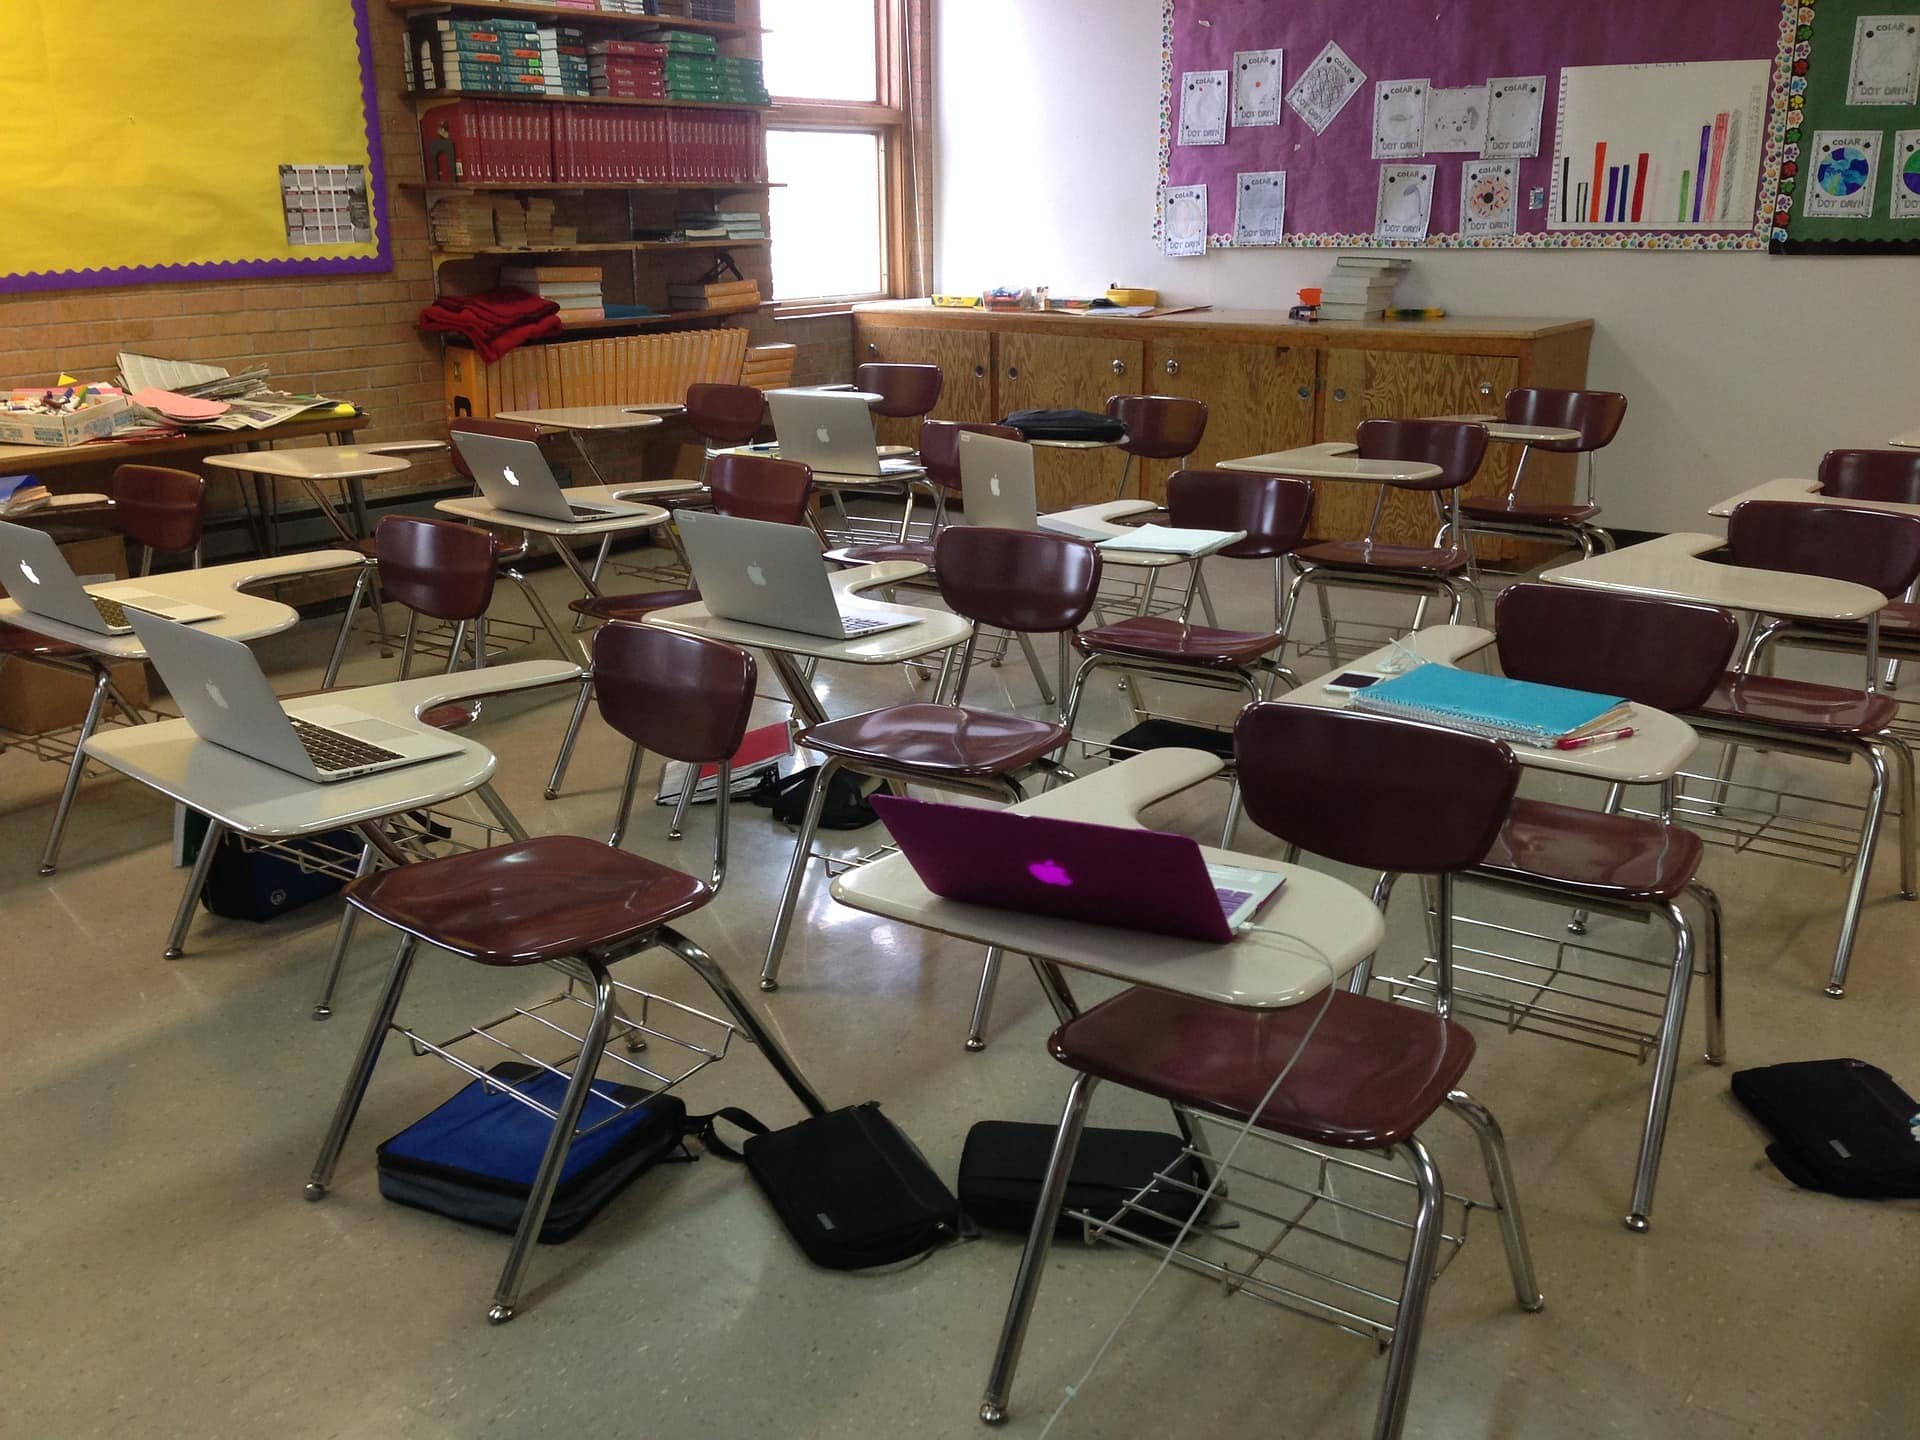
Many emergencies like fires, floods, and earthquakes, can leave unstable buildings in their wake. Shelter in place or go to a reception centre until you know if your home is safe. Listen to first responders and local authorities for instructions on any special precautions that you might need to take before entering a building.
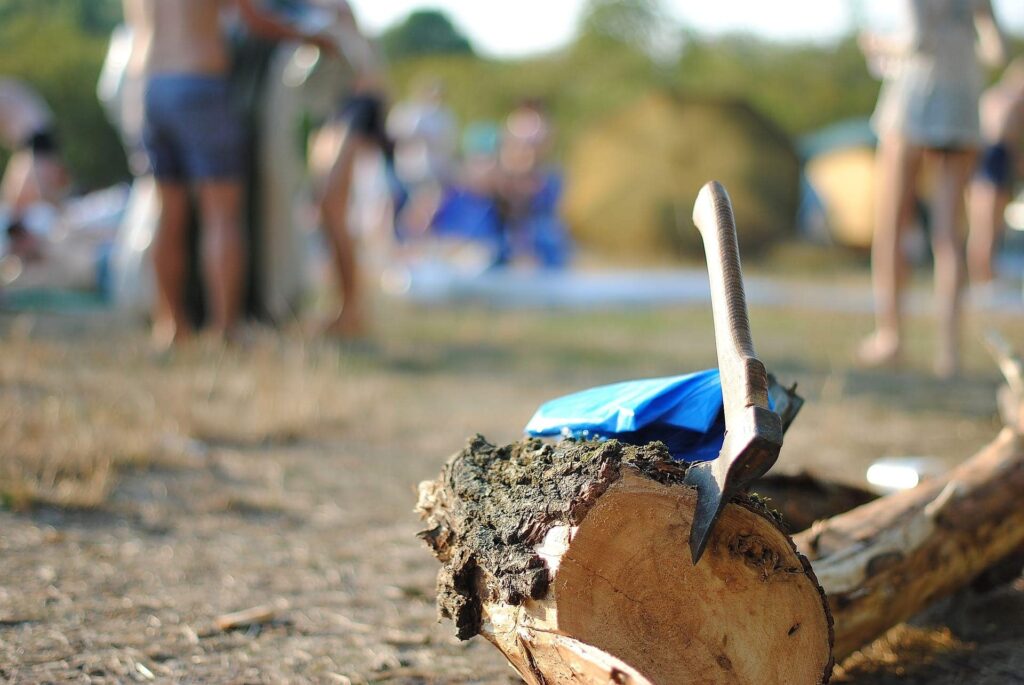
Once you have a solid understanding of how well your home did, or did not, survive the emergency, contact your insurance company to start a claim. If the disaster was widespread there could be a long wait while the company works through an overwhelming number of claims, so file early and be patient. List all the items and property you have lost to help you with insurance, and to prioritize replacement. This may take a while and will likely be an emotional experience. Hang in there and trade off with a partner or take breaks as required.
Home inspectors will be in high demand after an emergency but do your best to book one. The inspector will be able to verify the safety and damage done to your home and will able to provide guidance on next steps.
Keeping Safe
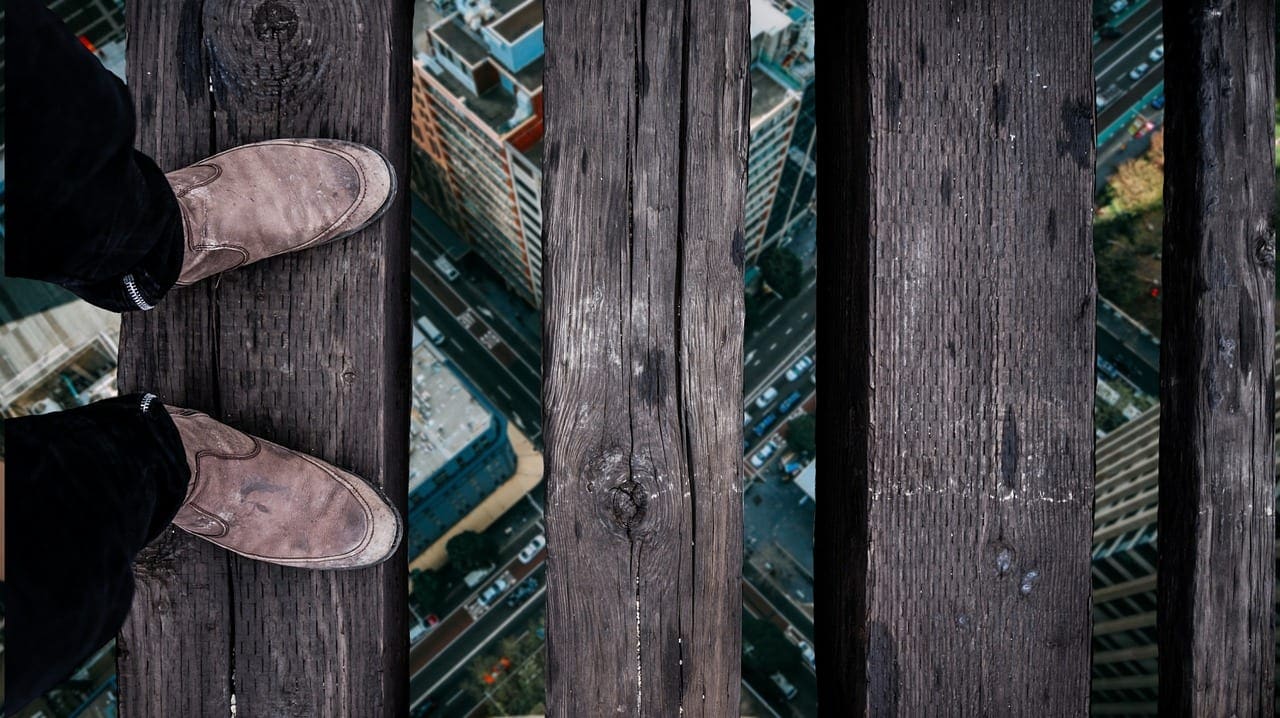
Chances are, the world will look a little different after an emergency. There may be broken glass, downed power lines, and other health risks to contend with. Luckily, there’s lots we can do to keep safe.
One of the most important things after an emergency is disposing properly of waste. This helps to contain outbreaks of disease and keeps germs away from water sources that some people may choose to rely on.
As we mentioned above, emergencies are a very high stress scenario. Stress can lead to many physical health problems, and serious mental health issues. As you move about an emergency be careful to avoid exhaustion. Make a list, set priorities and be sure to pace yourself.
Avoid environmental dangers created by the disaster: broken glass, downed power lines, contaminated buildings, contaminated water or air, gas leaks, slippery floors, exposed wiring, dead animals, smoldering debris, washed-out roads, or obviously unstable buildings. Wear sturdy shoes and work gloves (keep a pair with your emergency kit) and alert authorities if you spot these dangers.
After working with debris, and before handling food of any kind, be sure to wash your hands thoroughly. When packing your emergency supplies be sure to include soap and/or hand sanitizer. If you want to go the extra mile look for biodegradable soap that is safe to dump into your green spaces.
Emotional Responses to Disasters
Everyone handles disasters a little differently, but there are some behaviours that are very common. Learning to look out for these can help you to assess a situation and understand your own reactions.
Remember to watch out for these reactions in first responders and community volunteers as well. They are likely going through similar stresses to you so be kind. Physical and emotional care is important for everyone, no matter their role in an emergency.
First Reactions
- Disbelief and shock
- Disorientation and numbness
- Fear
- Reluctance to abandon property
- Problems with concentration or memory
- Difficulty in making decisions
- Need for help and information
- Helpfulness to others.
Later Responses
- Frustration and anxiety
- Anger and suspicion
- Moodiness and irritability
- Apathy and depression
- Unexplained crying
- Fatigue, low energy
- Change in appetite
- Digestive problems
- Difficulty sleeping or sleeping too much
- Headaches, body pain
- Feelings of powerlessness
- Feeling overwhelmed
- Guilt for survival or for not preventing disaster
- Isolation from family and friends.
Common Responses by Children
Children and pets will often react differently to an emergency than adults. Understanding the scope of what has happened can be especially difficult for them, and their fears and insecurities will manifest in a variety of ways:
Children
- Return to past behaviour such as thumb-sucking or bed-wetting
- Clinging to parents, crying or screaming
- Reluctance to go to bed
- Nightmares
- Fantasies that the disaster didn’t happen
- Refusal to attend school
- Inability to concentrate
- Withdrawal, immobility
Pets:
- Unusually nervous or fearful
- Sensitivity to noise or storms
- Excessive protectiveness
- Increased aggression
Healing
For adults, the process for emotional healing after a disaster is simple, if not easy. Discuss what happened, listening carefully to each person and not interrupting. Consider limiting your family’s exposure to media coverage of the event, especially if the emergency was graphically intense (many casualties for example).
Take time to grieve and give yourself permission to rest when you need it. Recognize that you have suffered a loss (even if that loss is normality) and be patient with yourself. Take time to appreciate what you still have.
Helping Children Heal
Encourage your children to share and express themselves, especially through play or physical activities. When they do choose to confide in you, listen carefully and take what you are told seriously. Reassure them often and give plenty of hugs.
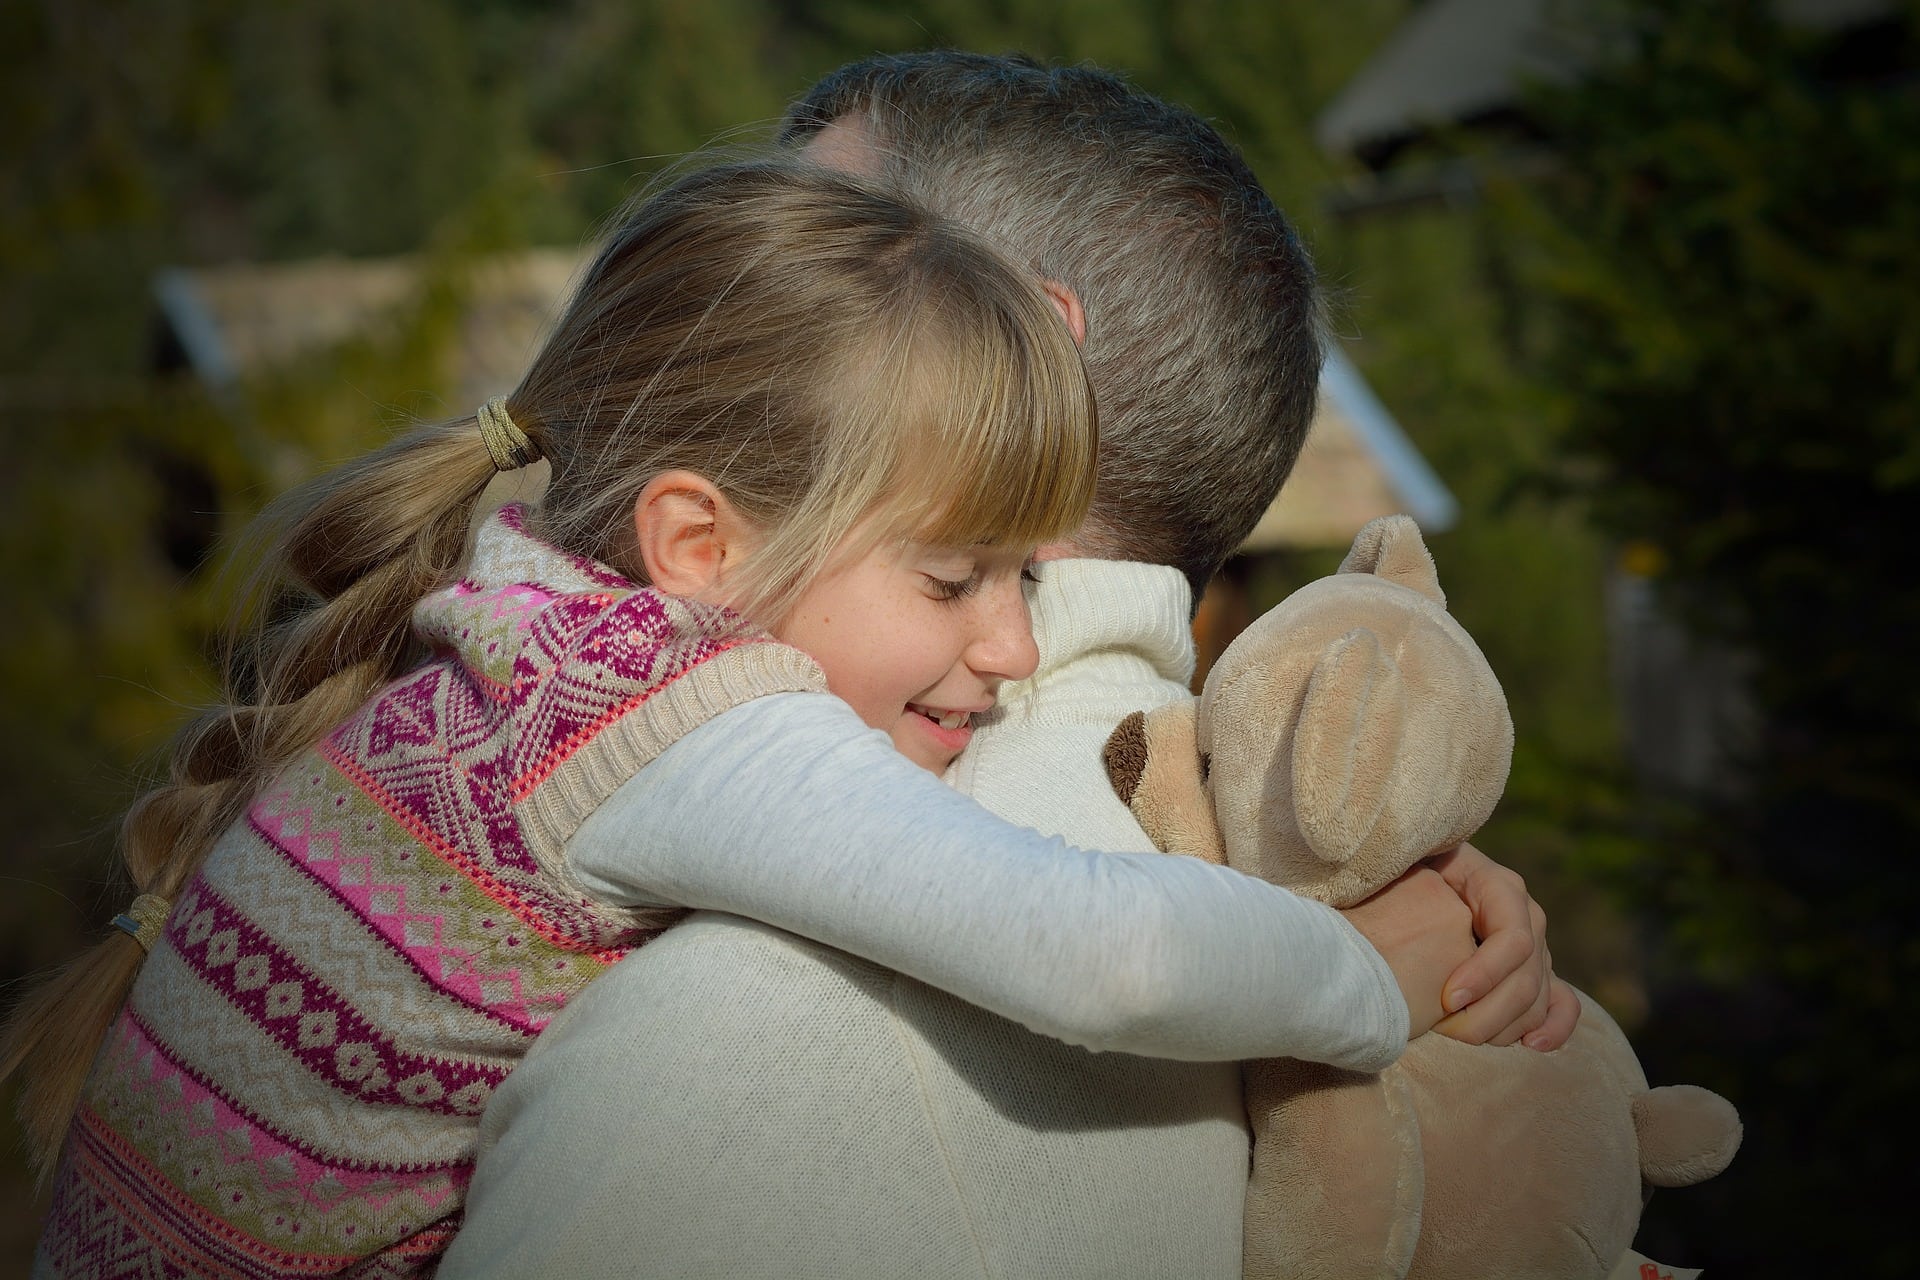
When it is safe to do so, include kids in clean up activities. This helps them to feel included, useful, and like they are helping things to get back to normal. For the same reasons, try to introduce aspects of their old routines, or if that’s not possible, new routines for day-to-day activities.
Children may display immature behaviour, or backslide a little in their development after a disaster. This is normal. Do not draw attention to this behaviour. Instead, praise them when they help with chores or act like their old selves. Anxious children may prefer to sleep in a pup tent or under a table draped with a table cloth. If regressive behaviours last longer than 2 weeks, seek professional help.
Pets may be aggressive or nervous after a disaster. Teach your children to give animals space and that they might not be a good place to seek comfort until they are back to normal.
We’d like to say a big thank you to the BC CRD for putting all this information in one easy and convenient workbook, available for free online, or at many of the provinces fire and municipal halls.
Thank you for reading!
This article was written by Zenia Platten – Author of Tethered and emergency preparedness professional.
Getting Your School Emergency Ready
September has come around yet again so it’s time to talk about what PACs and faculty can do to make their school emergency ready. At Total Prepare we understand that teachers and parents are some of the busiest people on the planet, so we make preparedness as simple as can be! Below we’ll talk about our worry-free fundraisers, parent-direct buying programs, and bulk ordering processes, as well as drills, training, and programs available to schools.
Without further ado, let’s dive in!
ShakeOutBC
On the third Thursday of October every year there is a major earthquake that can be witnessed across the world. It’s imaginary, but you’ll still see millions of people practicing Drop, Cover, and Hold On and evacuating schools and businesses. This phenomenon is called Shake Out.
Shake Out is the largest coordinated earthquake drill in the world, and the perfect excuse to talk preparedness. Register your school to be listed as a participant and when the clock strikes 10:17am, be ready to Drop! Find resources to help you plan your drill, or to increase awareness of students and staff, here. This year’s drill is on October 17 (2019) at 10:17am.
Drills
Nothing improves skills like practice, practice, practice! When it comes to honing the reactions of students and staff for an emergency, the same holds true. Ensuring that everyone knows their role and is familiar with what steps they are meant to follow will help your emergency plans run smoothly in the event of a disaster.
Work with your school to create a calendar for drills throughout the year and be sure to cover a variety of emergencies. Ask teachers to discuss emergency procedures and best practices with their students in the week(s) leading up to each planned drill. Types of drills to consider include: Fire, Earthquake (for BC and Quebec), and Lock Downs. While many other emergencies may affect a school, these three are the easiest to simulate and practice for.
Practice sheltering in place, evacuating, and choose some lucky students to pretend to be injured. This helps students and staff to practice reacting to unexpected circumstances that are very likely to occur in a real emergency.
Earthquake
If you’re practicing an earthquake drill have a noise or signal mark the quake. A tone, an announcement, or having teachers bang on desks have all been used. My high school would actually play the sound of a real earthquake through the PA system.
At the signal have students Drop, Cover, and Hold On under their desks or other sturdy furniture and count to 60. Feel free to play the signal noise a second time to signal an aftershock, at which point counting should begin again at zero. Once the biggest danger of aftershocks has passed, escort students to the school’s muster point and await further instructions. Depending on your schools approach, you could even practice distributing supplies.
Fire
Fire drills should include the fire alarm so students are familiar with the sound. One it’s ringing students will need to evacuate calmly, without stopping to grab their things. Be sure students know to crawl under smoke and to test doorknobs for heat before opening them if they can’t see inside.
Lock Down
Work with students to practice hiding, barricading doors (carefully), and finding the best escape routes. Go over protocols and how to handle the situation. For more information on this check out our article on Man-Made Emergencies.
Pro-D Days
Hurray! It’s a Pro-D Day! Oh, but wait… we’re not students anymore! Suddenly it’s not just a day off, but a ‘professional development’ day. Alas. It’s time for our teachers to hone their already impressive skills and sculpt student success with extra training and collaboration. *Cue Rocky soundtrack.*
Pro-D days are the perfect opportunity to ensure that all teachers and staff understand the school’s emergency processes without the added complication of students underfoot. Going over plans, muster points, different types of emergencies, roles, and responsibilities is an excellent addition to any Pro-D day plan. After all, if your teachers don’t know what they’re meant to do, how will the students?
Supplies
In lockdown situations students and staff can be trapped in one classroom for hours without access to a bathroom. In winter storms and earthquakes they might be trapped on school grounds for days if the roads are inaccessible. Is your school prepared to feed, hydrate, and care for everyone?
Emergency authorities across Canada recommend being prepared for at least 72 hours in the event of an emergency – and that counts for schools too. The most important areas to cover are food, water, sanitation, and warmth – but ideally there would be enough supplies to cover all eight areas of preparedness. If you live in an earthquake zone please – please – be sure to have enough N95 masks on hand for everyone. They’re inexpensive lifesavers.
Logistics
If you are planning a supply cache for a school and aren’t sure where to keep things there are a few common practices I’d like to tell you about.
Classroom Kits – Many schools and daycares choose to keep a kit in every classroom.
Storage Chests – Keeping kits in large, locking chests throughout the school is another popular method. This works best if the emergencies you’re planning for will allow freedom of movement throughout the halls.
Sea-Can – Most popular with middle and high schools, Sea-Cans allow for supplies to be securely stored in bulk. This works great if emergency muster points put your student body all in one place. Very common when planning for earthquakes.
Total Prepare has a variety of workplace and classroom kits that can work for the above options. If you’re looking to fill a container, or want something specific, just contact us and we’ll be happy to help!
Individual Comfort Kits Made Easy
Many schools choose to have a handful of communal supplies like toilet buckets and tarps. They’ll then ask parents and sometimes even teachers to pack their own emergency supplies. Usually these need to be refreshed every year to replace granola bars and bottled water, and require parents to go all over town in search of obscure items like emergency blankets.
Total Prepare is taking the hassle out of this process! Let us know the name of your school and we’ll provide a pdf handout for students to take home, or for email distribution. It details the quick and easy process that parents and teachers can use to order a Basic Student Emergency Kit directly from our online store.
The orders are collected, built, and labelled with each student/teachers name and grade before being shipped to the school for distribution. It’s that easy! No helter-skelter across town looking for ONE light stick with kids in tow. No standing in the grocery aisle comparing expiry dates. No arguing with parents/teachers over any missing items from the requirements list. Just one pdf, one online order, and BAM! Your kids are prepared. And they’re not just prepared for this school year. Our kits have a 5 year shelf life – so they’re set for half of their school career!
Want to participate? Contact us and we’ll hook you up! (As the kid’s say… or used to say. It’s been a while.)
Masters of Disaster
If you live in BC you have free access to a program called ‘Masters of Disaster.’ It’s a prepared curriculum on emergency preparedness that includes handy resources like workbooks. The program is designed to educate BC youth on safety and preparedness, and looks at the 10 biggest risks in BC.
Total Prepare encourages teachers and faculty outside of BC to take inspiration from the program too. Many of the ideas discussed happen throughout Canada, like wildfires and flooding. Regardless of where our young people are, teaching them how to react to emergencies will help set them up for success.
Parents! Check in with your teachers to see if your child is being molded into a Master of Disaster. If not, take it into your own hands. The curriculum is posted for free online and is simple for anyone to follow. We’ve also written about getting kids involved with emergency kits and training in the past, if you’d like more tips.
Encourage Preparedness at Home
No matter where you are, or what grades your school covers, there is one rule that all school emergency plans rely on more than anything else. One factor that decides the effectiveness of all other precautions and defines the desired outcome for educational facilities. That rule? At some point, parents will want their kids back.
Often when we work with schools we hear about how they only need a handful of supplies because the kids will all be picked up by parents right away. This always strikes me as a very optimistic way to approach emergency preparedness. We’re in the business of ‘what ifs’ and there are so many ways parents could be delayed or unable to reach the school in a major disaster.
All businesses, organizations, households, and yes, even schools, should have at least 72 hours of supplies on hand for everyone on the premises. In an ideal world, this would be the case. But here in our crazy 2019-earth we have the reality of budgets to deal with, and trust us, we get it.
If funds won’t allow your school to prepare optimally, then your best line of defense for students is to ensure their families are prepared. Making sure they have emergency contacts, reunification plans, and supplies (so they don’t stay once they have their kids) is really important.
Fundraisers
When it comes to getting families to prepare, nothing works better than a little incentive. Total Prepare is happy to help with that! We have complete fundraiser programs that allow schools and PACs to receive up to a 35% fundraising rebate on certain products. We provide order sheets, guidance, and once orders are ready we’ll ship them all to the school for distribution (clearly labelled of course!)
When everything has shipped we’ll be in touch with the organizer to let you know how much the fundraiser raised and you can decide to either spend it as a credit towards emergency supplies, or have us send the school a cheque. It really is that easy.
Guest Speakers
Some of the most memorable lessons I learned in school were taught by people other than teachers. The consequences of drinking and driving, how much sugar is in Coca-Cola, and what it’s like to live with mental health issues were all things that stuck with me thanks to guest speakers. The same can be true for emergency preparedness.
Total Prepare offers workshops that can easily be brought to schools in BC, but every province is full of great people who work in the emergency services industry. Fire Chiefs, search and rescue personnel, or emergency managers are all great people to ask. Subjects to try and cover would be:
- What are the major risks in your area?
- What do you do during these emergencies?
- How can you prepare in advance?
- What will be the consequences after the emergency? (How much damage will it do?)
Summary
Total Prepare offers programs to ease the headaches of fundraisers, student comfort kits, and supplying a school for an emergency. We make it simple while providing answers and guidance throughout. We’re always here to answer any and all questions from parents, PACs, and faculty, and we’ll support you every step of the way.
Supplies aside, education is the best way to prepare for an emergency. Teaching students through programs like Masters of Disaster, and encouraging parents to get involved at home are great steps towards ensuring the success of students and our communities in the event of an emergency.
Thank you for reading, and as always: be prepared, not scared.
This article was written by Zenia Platten – Author of Tethered and emergency preparedness professional.
Preparedness as a Business Investment
When you open a business, you are embarking on a large-scale investment. You supply money, time, and resources (not to mention blood, sweat, and tears) in the hopes that they will pay dividends. The trick is to maximize the return you want to see – whether that return is pure profit, bettering the community, or spreading an idea or service. Today I’m going to make the case for preparedness as one of the most important business investments a company, big or small, can make. We’ll discuss how to measure the return on your investment (ROI) and how to best invest in preparedness to get the maximum value from every penny spent. We’ll include real-life examples provided by the Global Disaster Preparedness Center and compare the preparation for small businesses with that of mega-corporations.
Measuring Your Return on Investment
Business planning is all about data. While new ideas can make a splash, proven processes and observed precedents are the best way to project the success of any given investment. After all, history tends to repeat itself.
So, when we study preparedness as strictly a business activity, we need to look outward, to the world and areas that have survived disaster. There will be some stories included below of business continuity from Hurricane Harvey, but we encourage you to search out stories for yourself. Look for disasters that are like what you may face or go through your area’s history to see what has occurred in the past.
Business Continuity
According to The Institute for Business and Home Safety, 25% of US businesses that close because of a disaster never reopen. The chance of continuance for a small business is even lower, with 40-60% closing shop. I could not find a parallel study in Canada, but I think it’s safe to assume our rate of perseverance is similar.
Having an emergency plan, kit, and business continuity documents in place will dramatically increase an organization’s recovery time in the event of a disaster. The faster you recover, the faster you can return to business, and the faster income begins to flow again.
Staffing
People are the most expensive components of many businesses. Companies pay for employees’ time at a minimum, with possible additional costs in training and benefits. You’ve cultivated a team of talented people with a knowledge of your systems and procedures and the skills to make it all run smoothly. Imagine the headache and expense if your team were suddenly gone – it would be difficult, if not impossible, to recover from.
While emergencies are sometimes limited to the office (fire, chemical leaks, or civil emergencies) most natural disasters will mean your staff are facing their own problems at home. They’ll need financial support to pay for damages from the emergency, and if your business isn’t operating, they may need to go elsewhere to take care of their families.
So, what can you do to avoid potential staffing problems? Encourage employees to be prepared at home with employee buying programs (we do that!) and awareness events like Emergency Preparedness Week. Or, work a support budget into your emergency plan to help employees or the community itself to get back on its feet. With these precautions, alongside your own plans and supplies, you’ll give yourself the best odds possible for business survival.
Long Shelf Lives
I really love to talk about long shelf lives, but I love it for a reason. Investing in food and water with long shelf lives now can save thousands of dollars in expenses down the line. Not only does it save on replacement items AND avoid inflating prices over time, but it also saves your purchasers and emergency managers resources they would spend sourcing, purchasing, and swapping out those replacement items!
Small Businesses Too?
Yes! Especially small businesses! As we touched on briefly above, small businesses are much less likely to survive upheaval than a large one. 40-60% Of small businesses are hit so hard that they never recover. One horrible week of natural disaster and everything you’ve worked so hard for is gone.
We hear from many small businesses that they just don’t have room in the budget for emergency preparedness. We understand completely, and we have good news: preparing doesn’t need to be expensive. Below we’ll go over all the things you can do for your business – many of which just require some forethought or elbow grease.
Alternatively, just pick one area of preparedness every week, or month, or year (whatever makes it happen) and tackle them one at a time. Even if an emergency strikes before your kit is complete, you’re better off than you would have been with nothing.
How to Invest
By now you’re likely aware of some of the ways you can prepare your business (a kit, a plan, etc). But how can you get the most bang for every buck? How can you maximize your investment? Below we’ve listed ways to prepare in approximate order of expense (low to high).
Make a Plan
Planning takes time, but can be done for the cost of a binder, paper, and some ink. We’ve discussed emergency planning for businesses at length in the past, but in case you missed it we’ll do a quick recap here.
A business emergency plan should cover everything and anything to do with your business’ preparedness. Include the risks your business faces, both internal and external, as well as what the danger and the potential costs of each. Be sure to include non-monetary costs too.
Write down emergency procedures, and what safety measures are in place to prevent or minimize damages. Describe who is in charge of what in an emergency and how you’re going to make sure your staff know what they are meant to do.
Depending how badly an emergency would effect your customer base you might want to plan for a sudden drop in business. If you run a construction or disaster recovery company, plan for the sudden increase in customers at a time when your supply chain won’t be at its strongest.
Example
Five months after hurricane Harvey businesses in Houston, Texas were still dealing with a problem they had not anticipated. During the storm many elevators flooded making it impossible for some businesses to function fully. This was especially challenging for organizations with a mobility-challenged customer base, like medical services, care facilities, and day cares.)
Strategize With Existing Infrastructure
Your business may already have some great tools in place to help with emergencies. Take some time to consider how your existing resources can be used in emergency situations. Good examples of dual-purpose infrastructure would be using security cameras to keep an eye on a facility you can’t access, or using product you carry as part of an emergency kit.
Support Employees
People are the foundation of any great business. Chances are, you even like most of the ones you hired. To help keep your people safe and working it’s important to plan some supportive measures.
At a minimum, supporting your employees should involve asking if they are prepared at home with a kit, or at least extra food and water. Additional support might involve starting an employee buying program to get great rates on supplies for your team. These programs are free through Total Prepare and are an amazing way to help your people prepare their families.
If there’s room in the budget put aside some assets to provide direct support to your workers and even your community. Check out this great example of Data Foundry going above and beyond to help their team:
Example
Data Foundry (DF) is a data center colocation provider who were there for their team when they were needed most. In the immediate aftermath of Hurricane Harvey DF sent boats, gas, and supplies to the homes of impacted employees. They also reserved and paid for hotel rooms for the displaced and gave time off to those who needed to make personal repairs.
DF also brought in supplies from a secondary location to help staff in mucking out their homes. Families organized clothing donations and staff raised $20,000 USD in donations to relief efforts. DF matched it.
Create a Culture that’s Ready for Anything
In my opinion creating a culture of preparedness is the most important thing anyone can do to minimize serious injury or loss of life in an emergency. It also streamlines evacuation, supply distribution, and recovery. So how do you create a culture of readiness?
Practice, practice, and more practice! Schedule and participate in regular emergency drills at least once a year. Change things up every time to simulate different emergencies, or different situations within the same emergency. For example: have someone be ‘wounded,’ make usual evacuation routes inaccessible (imaginary fires are good for that), or have key staff members be absent.
The other major way to create emergency culture is to invite professionals onsite for training days. Training staff in first aid skills, light urban search and rescue, or even just taking a workshop on general preparedness are all wonderful ways to keep preparedness top of mind.
Get a Kit
Remember: There is every chance your staff will be on site for up to 72 hours after an emergency. They will need food, water, shelter, and possibly first aid supplies at a minimum. Total Prepare carries pre-built 24 hour emergency kits that are a great place to start, but consider going above and beyond with extra supplies. Contact our team and tell us about your organization – we’ll be happy to create something custom just for you.
If your organization expects staff to remain at work in an emergency please – please – call us for a custom quote. We have turnkey solutions designed for first responders, health care professionals, and communications/logistics hubs. These solutions account for the extra calories and water intake needed to support hard work (rather than just survival).
Insurance
Pretty much anything can be insured these days: Heidi Klum’s legs, Gene Simmons’ tongue, or Keith Richards’ middle finger for example. These people have insured their livelihoods and trademarks, and so can you.
Insurance plays a critical role in the recovery of many organizations. Do some serious research and speak with experts about the options available to you. Multi-hazard policies can be especially useful. At a minimum insure against the top risks in your business plan, as well as obtaining business continuity insurance. The latter will be invaluable even if your business survives an emergency in pristine condition but loses customers and income due to disaster.
Reduce Risk With Preventative Action
This is the most expensive way to prepare your business, but also one of the most valuable. Go through the risks from your emergency plan and examine what could be done to minimize the damage from each. This might involve installing fire sprinklers, upgrading equipment, installing generators, adding flood barriers to doors, or even something as simple as changing the way a hazardous material is stored.
Example
After Hurricane Harvey the owner of Beans Café in Houston could have saved upwards of $20,000 USD in food loss and replaced equipment with the purchase of refrigerators with top motors. The commercial fridges she had on hand operated on motors at the bottom of the units and were ruined when the flooding reached them.
Summary
Emergency preparedness is a strong investment for any business. ROI can be seen in employee retention and business survival rates for comparable organizations post-emergency. There are so many things that business owners can do to strengthen their businesses in this area, without the need to blow the budget. But with a little investment, you’ll see your preparedness paying dividends after an emergency, regardless of the size of your business.
Thank you for reading.
This article was written by Zenia Platten – Author of Tethered and Emergency Preparedness Professional.
Primary Source: https://www.recoveryplatform.org/assets/publication/Publication2019/Why_small_businesses_should_invest_in_preparedness.pdf
How to Save Thousands on Emergency Prep
Being prepared for an emergency is crucial to personal and community well-being. Despite this, even known earthquake zones see less than half of the population actually readying themselves for potential disaster. Here at Total Prepare we understand that getting yourself in the proper headspace for gathering supplies can be a difficult task. After all no one wants to spend money on something they’re potentially not going to use. For these people (and anyone who likes to get the best bang for their buck) we’ve got some tips and tricks on how you can save THOUSANDS on emergency preparedness. Let’s get started!
Long Shelf Lives
Emergency supplies are a unique in that they’re one of the few things you buy intending to leave them in the closet for (hopefully) years. Due to this longevity, the initial price tag on your kit isn’t the whole cost of your supplies. Every year it’s important to go through your kit and weed out any items that are expired or haven’t stood the test of time.
In most kits, the items that need the most frequent replacement are food, water, and first aid. Each of these have an industry standard shelf life of 5 years unless they say otherwise. Due to this, we need to factor in the cost of replacing the supplies and keeping them up to date to reflect the real price of a kit.
For example, let’s take our most popular 72 hour kit, the Family Prep Survival backpack for 4 people. As of today this kit retails for $292.95. Every 5 years the food and water inside require replacement:
4 Ration Bars x $10.50= $42.00
24 Water Pouches x $0.79 = $18.96
$42.00 + $18.96 = $60.96 every five years, or $304.80 over 25 years.
As you can see, replacing items regularly can really add up! If you have a larger family, or are preparing for a school, business, hospital, or other organization the effect is amplified over more people. But by investing a little more up front for items with loooooong shelf lives, you can save A LOT of money over the life of the product.
Blue Can Water
We talk about Blue Can Water and its incredible 50 year shelf life a lot at Total Prepare, but that’s because we just can’t get over how awesome it is! The practical cans can be easily put down (unlike pouches) and are easy to open without spilling. As an added bonus, they’re made from recycled aluminum, and can go back into the recycling stream when they’re used up! As if that wasn’t enough, Blue Can Water is also a ‘win’ for your wallet.
If we take the same kit from the previous example and replace the water pouches with Blue Can Water, watch what happens:
24 Water Pouches = 3L
A case of Blue Can Water = 8.5L – more than double the volume of the pouches.
Case of Blue Can Water = $49.95. That’s it. That’s the whole cost for 50 years.
9 Replacements of 24 Water Pouches = $18.96 x 9 = $170.64.
These numbers don’t even take inflation into account! Already we’re saving over $10 every 5 years on emergency water for a family of four – AND they’re getting more water each than they were with pouches. As we prepare for larger groups or for longer time periods, the savings only increase!
Freeze Dried Food
Ration bars are great. They can be stored in a wide variety of temperatures, are super compact, and require absolutely no preparation. They’re even tasty enough to eat as office snacks (talking from experience). But does anyone over the age of 7 really want to eat nothing but shortbread cookie-like bars for 3 days straight?
No.
Especially when you could be eating stroganoff, pasta primavera, chili, or pancakes. This is where Legacy Premium Foods come in. They have a 25 year shelf life, are non GMO, made with no added MSG, and have gluten free options. All the meals are vegetarian too! (Meat available separately if that’s more your style. 😊 )
I can already hear you asking: yes, but don’t they cost more?
Let’s find out through the glory of math, sticking with the example we’ve been using so far:
4 Ration bars = 14,400 calories
40 Servings of Legacy Food = ~ 14,840 calories
60 Serving Breakfast Lunch and Dinner Bucket = $289.95.
40 Servings from this^ bucket (199.95 x 66%) = $191.37 This cost does not change or increase over 25 years.
5 Replacements of Ration Bars = 5 x $42.00 = $210.00 <- This price is not accounting for inflation, so it would be much higher.
As you can see, Legacy Food saves you money over the life of the product, just like Blue Can Water. On top of that, you don’t need to spend your valuable time checking expiration dates and going shopping for replacement items. This savings is what my economics professor called an opportunity cost. Think of all the other things you would rather be doing than replacing emergency bars!
I should note that Legacy Food does require additional water and fuel to cook but there are many inexpensive ways to keep these on hand. A BPA-free plastic water container (like you might use for camping) and a campfire can do the job wonderfully. When you start dealing with larger quantities of food, Blue Can Water becomes an economic solution for rehydrating food too.
If you’re preparing for an organization and want to know the best solutions for your kit is, feel free to contact us – we’re happy to do the math for you.
Shop the Sales
As in all money saving endeavors, shopping the sales is a top-notch strategy. Emergency Kits and Food Storage go on sale regularly at totalprepare.ca with savings of up to 25%. If you would like to be notified when we have a sale scroll to the very bottom of this page to sign up for our email list.*
*Per our privacy policy your email won’t be used for anything other than Total Prepare emails.
Group Buy
If the item(s) you want aren’t on sale, worry not! There are other ways to save. Ask around your work, school, and social circles to see if anyone you know would be interested in purchasing items with you. We can often do special deals for large orders based on volume discounts. If nothing else, it never hurts to ask!
Another strategy is to champion a preparedness effort in your workplace. If your business buys supplies we can bundle your supplies with theirs for pricing. We can even keep the bills separate to save your accounting department from headaches!
Fund Raisers
Chocolate bars and coupon books are all fine and dandy, but what about fundraising with things that are useful in the long term? Our fundraising program is quick and easy with prebuilt hand-outs and instructions for parents.
Orders placed for select items are eligible for a discount and/or a rebate directly to the school. At the end of the ordering period all of the orders are shipped together to one location, clearly labelled for distribution.
These fundraisers work great for PACs, daycares, mother’s groups, and youth clubs (think scouts/girl guides). Total Prepare loves to help our communities in any way we can, and fund raisers give us that chance. There’s nothing better than helping families get prepared while also giving back!
Employee Buying Programs
If you’ve already prepared your business you’ll want to ensure that your staff are prepared at home too. Having a kit to go home to will help to minimize employee reliance on your supplies in an emergency. The last thing anyone needs is for Steve in accounting to bring his family of 6 back to the office for food when they realize they weren’t prepared.
Total Prepare makes this process simple and straightforward. We can provide special pricing for your organization, along with an order form, for distribution. Employees fill the form with what they need, or enter a coupon code online, and orders are delivered together to the office for distribution. Some organizations have even implemented payroll deduction programs so staff can pay for their orders in installments, directly through the business.
Repurpose What You Already Have
In our store we have the pleasure of showing off our emergency kits to customers in person. More often than not, they’re struck by the realizations that “Hey! I already have half of this stuff.” This is a great position to be in!
If you camp, backpack, or have inherited camping gear from an outdoorsy uncle (happens more than you’d think) then you’re well on your way to a complete emergency kit! After all, dealing with an emergency is just camping without notice. Okay, there’s a lot more stress than camping – but the supplies are the same!
Even if you’re not an outdoors-person, and Uncle Jim is stubbornly hanging on, you might already have many items for your kit. Blankets, tarps, toothbrushes/paste, pots and pans, cutlery, and toilet paper for example.
The catch with having all of these items in your home is that they’re not easy to grab and go. Gather all the pieces into one place, preferably in something you can roll or carry, so that its easy to grab if it’s needed. If a storm or forest fire is heading your way you might only have a moment to take what you need.
Plan With Your Neighbours
Whether or not you’re keeping up with the Jones’ it’s important to keep them in mind as an emergency resource. If you have a family size tent, but the kid’s have all left home, make a deal with the couple next door to share shelter if they’ll let you use their generator. Or have one family prioritize canning fruit from their trees to share, and another provide the firepit and wood. Once you start talking you’ll be amazed at how much more resilient your neighbourhood is when it stands together.
Plus, you’ll only need to pack a fraction of what you would have needed alone.
Investing Now Saves Costs Later
I’ve mentioned inflation a few times in this article but in researching for this article I was amazed by just how quickly it effects the costs of preparedness. Inflation increases costs by about 2% each year, so something that costs $100 now, will be $110.50 in 5 years. That adds up quick!
This, coupled with the fact that delaying preparedness could result in an emergency happening before your ready, means that there’s never been a better time than the present to get prepared!
Thank you for reading.
This article was written by Zenia Platten – Author of Tethered and emergency preparedness professional.
Top 7 Summer Safety Hazards
Summer is my favourite season. Blue skies, barbeques, sun-naps, swimming, camping, and hiking make it an ideal time to get outside and have some fun. With all these summer-specific activities comes unique risks that are uncommon in colder weather.
Today we’ll look at 7 Summer Safety Hazards as described by Doctor Ryan Stanton. These are the top injuries and ailments that he sees this time of year, along with how to avoid them. Read on to learn about minimizing your risk and keeping you and yours safe and healthy this summer.
1. Mower Accidents
If you get no further into this article than this, at least read these words: Do not stick your fingers into a lawnmower. EVER.
Or your toes, or anything else that is a part of you. The blade might have stopped, but as long as the spark plug is in the machine it can resume again with no warning. Unless you are the Flash, you can’t dodge that. The spark plug can be disengaged or removed, at which point it is safe to work on/with the blades. A professional can show you where it is and how to disengage it.
Sticking fingers into a lawn mower is not the only way Dr Stanton sees people get hurt. The spinning blades can catch rocks and sticks and fling them at high speeds towards the operator. I once read a story about a woman who ran over a nail with her lawn mower. The blades caught it and propelled it towards her heart. Happily, it was caught by her Wonderbra before it could do any significant harm.
Here are Dr Stanton’s tips to keeping safe while pushing around spinning blades of doom:
- Wear protective shoes and clothing. I know it ruins a good tanning opportunity, but it’ll be worth it. Closed or steel toed shoes, long pants, goggles or sunglasses, and work gloves are ideal.
- Keep kids away from lawnmowers, or teach them proper safety procedures. If they can’t respect that the mower is a dangerous tool, they shouldn’t be allowed near it.
- Get a professional to service your lawn mower.
- Wear a Wonderbra for mowing. (Okay, that’s my tip – but I’m sure the good doctor would agree!)
2. Boating Injuries
The sun’s out, the water’s clear, so it’s time to clamber aboard the Aquaholic for some fun! Tubing, fishing, sailing, or chugging along in a hot-tub boat are all perfect ways to spend a summer afternoon. But, alas, as with most large motor equipment, boats come with their own set of risks.
Most boat accidents are caused by inclement weather or drunk-driving. Be sure whoever is acting as skipper (driver) for your trip is sober and has a boater’s license. Check the weather before you head out and keep an eye on the sky during your trip.
I can’t talk about boat safety without mentioning lifejackets. Although some regions only state that the lifejackets need to be available and on board, encourage everyone to wear them, especially when the boat is moving at speed. Children should always wear floatation devices on board the vessel. If someone loses consciousness in the water they risk drowning and being hit by a propeller. These are less likely if they are floating where help can reach them.
If you’re planning a boat trip, especially if there will be children present, consider taking some basic first aid and life-saving courses. They usually take one day or less and can often be found through your local rec centre. Basic CPR and chest compressions alone can go a long way towards saving someone who has inhaled too much water. If you’re cautious around mouth-to-mouth you can find masks with one way valves- specifically designed to only allow air to flow one way, eliminating your risk of contamination.
3. Dehydration
Did you know that people who die of dehydration in the desert often do so with water left in their canteens? They believe that if they have water, they can’t die of dehydration. Surprise! That only works if you drink it!
While you’re out and about in summer weather be sure to bring water with you and keep some in your car. Drink regularly and deeply. Your body will thank you for it.
How do you know if you haven’t drunk enough fluids? You’ll get dizzy and light-headed. If you’re hot but have stopped sweating you could have heatstroke, the most severe form of dehydration. Other symptoms include hallucinations, unconsciousness, and even seizures.
Drinking any kind of fluid will help reduce dehydration, but water is best. Try to get any high-energy activities done early, before it gets hot, or in the evening when it cools off. If you are out in the sun take plenty of shade breaks.
If you encounter someone who has heatstroke take them indoors or into the shade and cool them off with ice packs and cool cloths. Have them lie down. If you don’t see improvement within ten minutes consider taking them to the emergency room to get intravenous fluids.
4. Sunburn & Skin Damage
We all know that harsh, bright pain of a sunburn, but did you know that every sunburn increases your risk of skin cancer? Having just five sunburns in your life doubles your chances for melanoma. On top of that, they itch, they hurt, and they peel. Really severe sunburns can even blister! 🤢
Sunburns are a form of radiation burn caused by over exposure to the sun’s UVA and UVB rays. They are similar to thermal burns and can be fatal in really extreme cases. The sun’s rays cause direct DNA damage which triggers the redness and pain. Damage can cause cell death and the body replaces the skin through peeling.
As you probably guessed, covering up when you go in the sunshine and sticking to shady areas are the best thing you can do to avoid burns. If you are going in the sun, wear sunscreen. All sunscreens have an SPF rating to let you know how strong they are. SPF 30 rating is best as higher ratings don’t offer significantly more protection, only an exaggerated sense of security. Reapply every 2 hours and use about 30ml if covering your whole body (2mg/square cm of skin).
5. Picnics Gone Wrong
Ah, summer. The time for hiking, enjoying the great outdoors, and… food poisoning?! Oh dear! That’s not how anyone wants to spend the most beautiful months of the year.
While I’ve been very lucky to have avoided food poisoning in my life, I tremble in fear every time a friend or relative tells horror stories of a weekend spent wrapped around a toilet in misery. Nausea, vomiting, and diarrhea are the primary symptoms of food poisoning – those, and perhaps a new appreciation for easy-clean porcelain.
Food poisoning is caused by ingesting harmful bacteria. These bacteria love to grow on room temperature foods, favouring dairy, eggs (including mayonnaise), fish, and meat above all else. It only takes a couple of hours for unrefridgerated foods to grow the bacteria needed to sicken a whole party of guests.
Keep perishable foods refrigerated until the last possible moment before leaving on a picnic. Transport them in a cooler with ice to slow any bacterial growth. When packing the cooler be sure to put the items you intend to use first on top, so you don’t need to rummage and let all the cold out to find one thing.
If you’ll be grilling bring a meat thermometer. The outside of meat can sear very quickly, making it hard to tell if your filet is cooked all the way through. Steaks should be cooked to a minimum internal temperature of 63 degrees Celsius, ground beef and pork to 72 degrees, and poultry to 74 degrees.
Keep your hands and cooking area clean and use a different cutting board for raw meats. Be sure your meat is wrapped thoroughly and kept away from other items (breads, fruits, chips, etc).
If you do get sick, eat small portions of bland food when you are able, and sip lots of water or tea. If symptoms persist for more than a couple of days (or 24 hours in children) see a doctor.
6. Firework Fiascos
Before fireworks were restricted in my area there was an annual summer tradition of ‘firework battles’ between groups of thrill-seeking young people. Everyone wore their most protective clothing, split into teams, and proceeded to launch fireworks directly at each other. Suffice to say, there were some heinous injuries, a handful of fires, and it was a miracle no one was killed.
Nowadays consumer fireworks are banned in many Canadian cities and restricted in others. Some small pyrotechnics are still easy to get, like sparklers, but even these burn hot enough to melt metal and cause plenty of burns and eye damage every year. If you do make the choice to give sparklers to children, supervise them closely and make sure they are treating them with due caution. No ‘swordfights’ please.
If you or someone less careful than you does get burned by a firework wrap it in a clean t-shirt or towel saturated with cool water. If the burn looks severe or covers a significant portion of skin, take them to the emergency room.
7. Stings Bite
Bees and wasps and hornets, oh my! Not to mention the mosquitos! Summer time is positively buzzing with insects that can cause anything from mild discomfort, to death in extreme situations. Many Canadians are allergic to bee/wasp/hornet stings and can break out in hives or have their windpipe swell closed. Even people without allergies can go into shock if they suffer from many stings at once.
If you have a life-threatening allergy (or if your child does) be sure to always have an EpiPen close at hand. These are usually spring-loaded injections of epinephrine that can ease and slow a reaction. Administer them as soon as any reaction begins, especially if the subject is having trouble breathing. Most allergic reactions outlast the results of an EpiPen so be sure to get to a hospital for observance and additional treatment. EpiPens buy you time. They are not a cure.
If you have mild allergies (hives over a small portion of your body for example) take an antihistamine to combat the symptoms. Pro tip: these also help with itchy mosquito bites.
To avoid stinging insects all together wear light coloured clothing and avoid perfumes. Floral prints, dark colours, and sweet scents attract these insects. If you’re eating or drinking guard your food and drinks from wasps. It may seem simpler to just let the wasp take what it can carry, but he’ll tell his friends and they’ll all be back to freeload within minutes.
While hiking keep an ear tuned in for buzzing, and stay on designated trails. While most stinging bugs make their homes in trees (or housing eaves) mud wasps nest in the ground and are very irate if disturbed. If you come across a hive on your property, do your research on how to safely remove it, or hire a professional. Do not allow your children to ‘play’ with hives.
Summary
At Total Prepare we wish you a fun, safe, and hazard-free summer, but for times when avoiding the hazards is impossible we hope the above tips on boat safety, mower accidents, dehydration, sun protection, allergies, and food poisoning help you to deal with each in the safest possible way.
Thank you for reading.
This article was written by Zenia Platten – Author of Tethered and Emergency Preparedness Professional.
Why Your Business Needs a Strategic Emergency Plan

The good news is that your company is ready to create a Strategic Emergency Management Plan (SEMP). The less-amazing news is that these plans can be daunting, especially for those new to the industry. The super news is that Total Prepare is here to help!
Businesses, especially large corporations, will often require a document or binder outlining all the aspects of the company’s plan for dealing with emergencies. If your business is growing (congratulations!) and you feel it’s time for a strategy of your own, or if you’re overhauling an old plan, we’ve got some tips, tricks, and guidance to help out.
What is a Strategic Emergency Management Plan?
A SEMP is a written and (hopefully) well thought out plan for what a business has done, is doing, and will do to maximize the resiliency of their operations and employees during an emergency situation. These plans should cover all of the most likely disaster scenarios, including man-made disasters and potential outbreaks.
The most important thing to know about a SEMP is that it is not your only emergency plan. It is a much shorter document then will likely be needed to provide a full, comprehensive risk assessment and full outline of all actions and duties. The SEMP is meant to be a complimentary document. It provides a unifying concept and strategy for all other emergency management efforts.
SEMPs can save lives, save businesses, and minimize negative impacts on the environment through good planning. The plan should outline objectives, organizational structure of the emergency management team, and processes. Remember, the SEMP doesn’t have to be long to be comprehensive.
The Emergency Management Continuum
There are four sides to emergency preparedness that are important to consider for any emergency plan, corporate or otherwise. Each flows into the next to create a continuum of best practices. Keep these areas in mind throughout all of your planning process:
I. Prevention and Mitigation – Reduce the risk to your organization, people, and infrastructure.
II. Preparedness – Create a plan, train your team, and have what you need on hand.
III. Response – How should you and your team react when the emergency happens?
IV. Recovery – Business Continuity Planning and Restoration.
Within these four areas there are many ways to maximize performance and ensure your operation is as emergency-proof as it can be:
- Regular risk assessments
- Engage your leaders
- Regular training
- Exercises and practice
- Improvement processes / check ins
- Performance evaluations
Before You Write
Assemble Your Team
The first thing to do once you’ve decided to build a SEMP is to assemble your team. Whether they’re X-Men, Avengers, Justice League, or their very own unique mix, your team will be the heroes of the office during an emergency.

Try to gather people from all of the major areas of the business. For example, have staff from the assembly floor, warehouse, office, and management included in your team. This variety of outlooks and departments will maximize the business knowledge involved and ensure that no details fall through the cracks. A team of entirely office staff, for example, might not realize that there are chemicals that need to be secured in the warehouse.
Involving someone in a management or senior position is a great idea too, as it will help to keep the SEMP and other emergency plans in line with the organizations ‘big picture.’ High-level strategy should not be overlooked, even in an emergency. Management should also ensure that the SEMP aligns with the company’s mission and values as much as possible.
Training & Responsibilities
Once you know who’s on your team, you’ll need to know what they can do. First aid training, logistics management, or light urban search and rescue skills are all valuable assets to any emergency preparedness team. Assess what skills you’ll need, and what skills your team already has. Identify any gaps and organize training as required.
Developing a reference for which personnel is in charge of certain responsibilities is the next step. It should be accompanied by a list of what that person will need (skills, maintenance, resources) to keep their area running smoothly.
Look to the Law

Be sure to check in with your provincial authorities to discover what the legal requirements for your organization are. Some organizations might be mandated to prepare (care homes for example) while others may have provincial recommendations in place. In BC for example, PreparedBC recommends tourism businesses prepare to provide support for their staff and their guests for at least 72 hours in an emergency.
You can also reference any existing emergency plans for your business or other locations (if you’re operation has multiple branches.) These are great places to look, not only for inspiration, but to ensure that any new initiatives operate in harmony with existing policies. Existing plans may include:
-Operational Plans
-Regional Plans
-Security Plans
-Business Continuity Plans
-Inter-agency Plans
Assess the Risks
So – you’re ready to get planning, right? Nope! We still don’t know what we’re planning for. Next we get to analyze and assess what kind of emergency the company is likely to face.
There are two types of threats when it comes to creating an emergency plan: Internal threats, and external ones. Assess your risks and how likely they are to occur and keep them in mind as you write your SEMP.

An external threat is anything coming from (you guessed it!) outside the business. This includes civil emergencies, disease outbreaks, and natural disasters. Internal threats are often related to data or operations. Things like chemical spills, computer viruses, and unstable shelving are good to consider for this category.
Think through how each of these risks might effect business, staff, customers, and infrastructure and add these to your notes. If you already have preparedness plans that address these things, look for gaps or inefficiencies. Once you have an idea of what you’re potentially facing, prioritize threats by likelihood and risk.
Develop a Plan
We’re finally ready to put pen to paper (or fingers to keys) and make your beautiful SEMP a reality. You should have an idea by now of what hazards your company may face, and what risk each of them poses, and know what resources are available for you to work with. You know what plans are already in place, and perhaps what plans you still need to implement.
There will be a link to a template further down that will help you to structure your SEMP, so we’re going to discuss the components here.

Section 1: Introduction
As with most internal documents it’s important to orient future readers to the purpose of the document. Use this section to touch on the legislative requirements mentioned earlier, as well as scope of the project.
The template below also mentions ‘background’ as one of this section’s headings. While some of this will need to be re-written to fit your unique organization, I recommend copy/pasting the four pillars of effective emergency management. It will help to put the reader in the right mindset for emergency preparedness if they haven’t done as much or as thorough research as you (good job!)
Section 2: What could possibly go wrong?
This is where the risk assessment we did earlier comes into play. Define the risks the business might face in detail and don’t hold back. Mention what likelihood each has to occur and what their consequences would be. List them in order of priority.
This is also a good place to list any vulnerabilities your organization has. They might be general, like being located near a fault line, or more specific to you, like that giant and precarious stack of cast iron in the warehouse. Safeguards that are already in place, like fire alarms, should be mentioned as well.
Once you have addressed your risks, ruminate on how they could be prevented or mitigated.
Section 3 & 4: Who’s got the power?
We’ll begin with section 3.1 of the template: Emergency Management Governance Structure. I’ve chosen this template because it was the most thorough example I could find. It was written as a guide to help Canadian government organizations to create their own SEMPs and as a result it has some sections that won’t translate perfectly to corporate preparedness.
That being said, it is still important to decide on a command structure for an emergency, though yours probably won’t involve the department Minister. Create a clear hierarchy for your organization with notes on who has decision making power in what areas. Disasters can create havoc so don’t lose time quibbling over who can and can’t make critical decisions.
Layout the duties and responsibilities held by each authority figure. Any tasks that will need doing in an emergency should be assigned to someone, with a backup listed in case of injury. Try to account for organizing evacuation, supply distribution, first aid, as well as activities like training new employees and maintaining kits and policies.
Section 5: Who doesn’t love a budget?
This section covers resource allocation and logistical support. Add annexes if things start to get complicated. Cover financial management and budgets, but also physical resources like emergency supplies and new fire sprinklers. If your organization is remote take time to think about how you’ll get your crew home safe and sound.
Section 6: Practice makes perfect
Outline how you’ll maintain this glorious plan and all its facets. Will there be annual training? Drills? Will the supplies be checked for expired product*? Is someone going through the SEMP regularly to ensure it’s up to date and reflects the current state of the business? Answering these questions will give you a solid idea of how your plan will be maintained and tested.
*Total Prepare will happily keep track of this for you and contact you when it’s time to replace. If preferred, we can contact you the year before too so the new supplies can be accounted for in the next budget year.
Seek Approval
You’re DONE! The document of your dreams lies complete before you, practically glowing with useful and life-saving information. Before you put it away however, it’s time to get it approved. Sorry – but there are budgets in it and those always need approval.

Meet with management and ensure to get their acceptance of the plan. If you ARE management, get some of your colleagues to read through it to look for short-comings, holes, and contradictions. The more eyes land on this document before it’s formally finalized, the better.
Everyone loved it? Perfect. You’re ready to implement your ideas and distribute copies of the plan to anyone who needs it. Paper copies are best – computers may be out of action in an emergency.
Emergency Management Planning Cycle / Timeline
Consider creating a timeline to help with regular quarterly maintenance of your plan. Making it a routine will help keep everyone on the same page and make sure that important maintenance actually gets done. Here’s how some branches of the Canadian government manage theirs:
Thank Gosh for Templates!
What would we do without templates? The one detailed above comes directly from the source page for this article. You can find it here. If you’re looking for additional information on creating a SEMP I highly recommend reading the whole article. It goes into great detail and lays things out well.
Summary
Creating a SEMP encourages cohesion between existing emergency preparedness plans and strategies. They touch on important aspects like leadership roles and decision making structures, as well as more traditional details like risk assessments and mitigation.
Thank you for reading!
This article was written by Zenia Platten – Author of Tethered and emergency preparedness professional.
We’ve Got the (Solar) Power! Do you?
Electricity is King in most households, whether we notice it or not. You’re reading this on a screen powered by electricity, or else printed on an electric printer. There’s probably at least a few lights on in your home, and perhaps a hair-dryer in your daily routine, or a coffee maker you couldn’t live without!
While electricity isn’t usually necessary for survival, it certainly makes just about everything easier, quieter, faster, and cleaner. But what are we to do when things go dark? Anything from a car hitting a power pole to a solar flare, to a major blizzard or earthquake can cause outages that last anywhere from a few hours to over a week.
There are two ways to prepare for an extended outage: Build an emergency kit that doesn’t rely on power (think back country camping) and go without the conveniences you are used to, OR add a generator to your preparedness plan. Both work, but today we’re going to focus on the generator option.
Why generators?
Generators come in a wide variety of shapes and sizes with a huge range of power and different types of fuel. What do they all have in common? They create electricity quickly and without being connected to the power grid. Many generators can even be connected to your home to directly power your usual circuits – talk about convenience!
This power can be used for smaller things (i.e. the aforementioned blow dryers and coffee makers) or for major must-haves like medical devices, refrigeration, or a sump pump to keep the basement from flooding. At Total Prepare, we have a special place in our hearts for emergency items that can pull double duty during our day to day lives and generators do not disappoint. Take one camping to watch movies in your tent, or bring one to the work site to keep power tools charged.
Solar VS Gas
The two most popular types of generators are solar powered units, and ones that run on gasoline. Both have their pros and cons, but for us, solar power wins every time. Why? Lots of reasons!


Solar power is renewable too, which is great for the environment, but it’s also great for emergencies where replacing your fuel stores may not be an option. Pop some panels into the sunshine and recharge without fumes, noise, mess, or fuss. Heck – you may as well set up the lawn chair beside them and catch some rays yourself.
Electric generators run so cleanly and quietly that you can run them safely indoors, or even in a tent. Having your electricity right where you need it is perfect for any situation, especially when it’s raining outside. Just plug your AC, USB, or 12V plug straight into the unit and use it as usual – completely plug and play!
How long will power be out?
How long your area will be without electricity in a disaster will vary hugely depending on where you are and how much damage was done. In 2003, for example, a malfunction at an Ohio power plant caused millions of people in Ontario to be without power for 2 days, whereas a major earthquake on Canada’s west coast could leave many without service for weeks. Whether you live in an urban or rural environment will effect blackout times too as recovery efforts will be focused on larger centres.
Other example scenarios:
- An EMP striking our atmosphere could disrupt power infrastructure for months or years. (If you’re concerned about EMPs consider protecting your electronics and generator with DIY Faraday cages.)
- After the 2011 Christchurch NZ earthquake it took 5 days to recover power to 82% of the eastern suburbs (13% took 2 weeks and the remaining 5% took even longer.)
- In 1999 a rogue lightening strike in Brazil, coupled with under maintained power infrastructure, caused a massive chain reaction. Up to 97 Million people were without power from March 11 – June 22. Three MONTHS without Mario Kart.
How strong of a generator do I need?
Much like emergency water, it’s rare to have too much electricity, however storage and budgets don’t always agree with that line of thinking. So how do you choose the right generator with choices that range from the (frankly adorable) Yeti 150, all the way up to the hulking and powerful Yeti 3000 (it comes with a hand cart)?
Unfortunately, the answer is math (I know, sorry.)
Every Yeti product has a number in the name. This number refers to the number of Watt Hours, or the amount of energy that can be stored in each battery. If you know how many watts your electronics use, it’s pretty simple to work out how long your generator will run them for:
A Yeti 400 will keep a 100W light shining for 4 hours (400Wh / 100W = 4 h)
If you don’t know how much electricity your devices use, you can usually find that number on the device, or online. If you’re looking for a faster method, here’s a cheat sheet:

Remember, if your unit is hooked up to active solar panels it will be charged even while in use, extending these times.
What about solar panels?
There are a lot of factors to take into consideration when deciding what kind of panels to get with your generator. As with electricity itself, it can be a ‘more the merrier’ situation. Although the larger Yeti units can accommodate up to 6 of the Boulder 100 solar panels (the largest we carry), they often don’t need that many.
Each generator has a maximum amount of power that they can accept from solar sources. Depending on your generator this can range from 60 – 480 watts. This will effect how many panels can charge it effectively. For example, if your generator only accept up to 60 watts, and your solar panels are capturing 160 watts from the sun, 100 watts of power is going to waste.
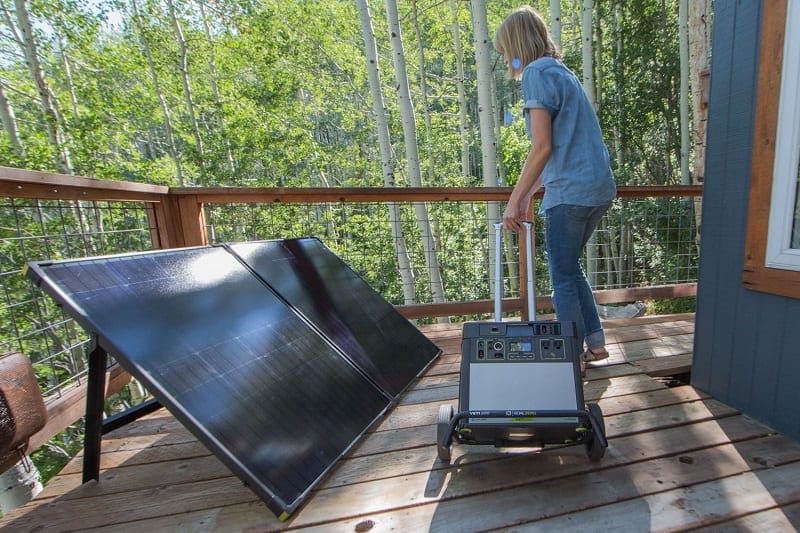
Even so, solar energy isn’t a perfect system. Your Boulder 100 solar panels aren’t always going to generate exactly 100 watts. You’ll have cloudy, short days for periods of the year and depending on where you’re putting your panels you might have shade to contend with. It’s wise to plan for this when deciding how many panels to include in your set up. Two Boulder 100 panels working at half capacity are still generating 100 watts.
Deciding on a generator and solar panel set up can be daunting. If you’re not finding the information you need, or if you want a second opinion, call our friendly and professional team at 1-888-832-1733.
Can I connect a Yeti to my breaker panel?
In a limited capacity – yes. Yeti’s are designed to be portable, so they’re not going to generate as much power as an installed unit that can support an entire house at full blast. Using a Home Adaption Kit however, Yetis can be connected to your breaker panel to maintain up to 4 circuits.
The connection does need to be activated once the power goes out, but for many units this can be done from the Goal Zero Yeti app. Keep your lights, fridge, or whatever else you need running with the tap of a button.
The Home Integration Kit is not approved in all towns/cities, so be sure to check with your local authorities on whether this is an option for you. If you decide to proceed with on demand, in-home power, please work with a licensed electrician to install the unit.
Can a Yeti be a backup for my electric car?
Why not? But it won’t get you very far. Let’s use a Nissan Leaf as an example car to see how this would work. The Leaf uses between 11-24 kWh to travel 100km. The largest Yeti unit, the Yeti 3000 has 3 kWh (or 3000 Watt hours). With these numbers we can conclude that you could travel between 12-30 km on electricity from a Yeti generator. Not far, but it might get you to the next charging station.
Can the Yeti run in freezing temperatures? We are in Canada after all!
The manufacturer recommends running your Yeti generator in temperatures between 0 and 40 degrees Celsius. That being said, customers have found success using their Yetis below freezing, by storing them inside a cooler with the lid propped slightly for ventilation.
All generators create heat while making power, and that little bit of heat, mixed with the insulation from the cooler, has often been enough to keep the unit purring along. Just make sure there is enough room for the fans to work on the side of the unit.
How easy are Yeti generators to move?
These robust units weigh anywhere from 13 – 110 lbs. The heaviest units usually either include a hand cart, or purchase one directly from the Total Prepare team. Oddly, the most powerful units aren’t necessarily the heaviest. The type of battery, lead-acid or lithium, can make a big difference to the weight of the unit.
Summary
If you’re thinking about getting a generator, remember to weigh the benefits of solar vs gas, and lithium vs alkaline. If you need any assistance or have any questions about Yeti and Boulder solar products please don’t hesitate to reach out to our team! We’re here to help. 1-888-832-1733 or hello@totalprepare.ca.
Thank you for reading!
This article was written by Zenia Platten – Author of Tethered, and emergency preparedness professional.
How Do You Deal With Man-Made Disaster?
Disclaimer: This article contains subject matter that may cause distress to some readers.

Canada is peaceful. We apologize. We open doors for people. We say ‘hi’ to strangers. Niceness is part of our cultural identity – or at least our stereotype. So why am I writing about horrible things that happen in other places, to other people?
Because Canada is far from immune. While other countries (I won’t name names) take center stage where civil emergencies are concerned, Canada has its fair share of turmoil and conflict too. It’s an unfortunate truth that man-made emergencies are just as important to prepare for as less-taboo, natural disasters.
If you’ve read our articles before, you likely know that Total Prepare takes a Prepared, not Scared approach to readiness. That’s why today we’re going to talk about what we as individuals can do to mitigate and respond to civil disasters. We’ll also look at what can be done on a larger scale to minimize these events in future.
The Golden Rule
As usual with emergency preparedness, the best thing you can do in a civil emergency is to stay calm. Fear, anger, and hysteria are contagious and damage our abilities to think clearly. Staying calm in a crisis will not only help you to see solutions quickly, but it will also help others to pick up on your ‘zen.’
Gunmen
Tragically, stories of disgruntled coworkers or unstable youths ‘going postal’ are no longer a rare occurrence. Too often we hear about innocent people getting hurt, or worse, without good reason. Like any disaster it’s important to learn the best ways to minimize your personal risk in these dangerous situations.
Run
If you hear gunshots, head the opposite way. Put as much distance between you and the source of danger as you can. We don’t care how many ‘likes’ a video of the event might garner, we want you safe.
If you can see the shooter, run in a zig-zag pattern. There’s a very good chance that the shooter is not experienced, or that they might be a little shaky, so moving sporadically will decrease their accuracy. As soon as the opportunity comes, get out of their line of sight.
Hide
Hiding from an active shooter has entirely different rules than those games of ‘hide and seek’ in the playground. Instinct will encourage you to hide in dark, quiet, enclosed spaces. Avoid these. Closets are not well known for their many escape routes.
Aim for an open room, preferably with more than one exit. Lock the doors if possible and note whether they open inwards or outwards. If they open inwards, barricade the door with whatever is to hand. Tables, desks, or the old cabinet with the ’90’s JVC TV in it. If the door opens outwards, just lock it and hide.*
*If you are an administrator looking to prepare, ask us about installing barricade devices for outward swinging doors.

Fight
Fighting is a last resort. All else has failed, and you’re facing the shooter. If you had time and allies beforehand, discuss a plan and use teamwork. If you’re on your own, try to find something to fight with. Fire extinguishers, chairs, or a fire hose can knock an assailant off their feet. At the earliest opportunity disarm the shooter.
Interesting Aside
While researching for this article I learned something I didn’t expect that doesn’t fall into the Run, Hide, Fight model, but is still good to know. If you find yourself instinctively throwing your body to the floor, don’t go all the way down. Stay on your hands and knees rather than sprawling flat.
When bullets hit the ground, they will usually travel along the surface of the floor, rather than ricocheting upwards. If you keep your vitals off the ground you’ll be less likely to accidentally catch a bullet traveling this way.
Riot

I am slowly becoming convinced that despite our easy-going reputation Canadians are quite hot-blooded. It doesn’t matter if it’s a lost Stanley Cup game or the local fire hall running out of free road salt, we can riot with the best of them.
Leave the area if you sense trouble brewing. It’s noble to want to stay and de-escalate things, but chances are you’ll only add to the chaos. Plan ahead when meeting up with a crowd. Think about escape routes and be sure to familiarize yourself with the area prior to arrival. If possible, stay at the periphery of the crowd and near an exit or intersection.
If you are heading into a situation that could turn ugly, wear clothing that covers your skin. Long-sleeve shirts and pants are good. Avoid outfits that make you look like police or military, and if there is a uniform or colour-scheme representing the potential rioters either avoid it, or wear something underneath so it can be removed quickly.
When moving through or away from a riot, move fast and keep your head down. Running can attract unwanted attention, so keep the pace to a brisk walk. If you’re not alone, be sure to hold hands or lock elbows with your group to keep from getting separated. There’s safety in numbers.
When you have put distance between yourself and the rioters make your way to an enclosed, controlled building. If possible, aim for a basement or sub-basement. Most riot violence happens outdoors, so just getting inside will greatly increase your safety.
Stay in touch with events through social media. This will help you know when it is safe to come out, or if you may need to evacuate. Do your best to contact anyone who knew you were going to the event, or anyone you care about who went too. Let them know you’re safe, but don’t tell anyone still tangled in the riot where you are.
If authorities begin using riot control chemicals, stay calm. Don’t wear oil-based sunscreen or moisturizers as these can help other chemicals cling to your skin. Wear glasses in place of contact lenses to nullify the possibility of getting chemicals caught between your lenses and your eyes. Protect your hands with gloves or by keeping them under your armpits. Your hands are covered in sensitive nerve endings and will be agonizing if affected. Lastly, avoid touching your face if you are anywhere near riot chemicals. The last thing you want is to transfer chemicals from your clothes to your skin.
Bomb Threats
Although most bomb threats are hoaxes designed to generate fear and anxiety, every instance of threat must be taken seriously and treated as if there is a live explosive in the area. Bomb threats can be received several ways, with the most common being phone, email, or letter.
If you receive a bomb threat call 911 immediately. Follow their directions and help others to do the same. You will be advised if an evacuation is necessary. If it is, coordinate with the 911 operator and any authorities in the area (eg: your boss, a security officer, or an event coordinator for example.)
Evaluate your immediate surroundings for unusual packages or items that are out of place. If you spot anything do not touch it and inform emergency services immediately.
If you are unlucky enough to be the person who picks up a phoned in bomb threat, there are a few extra steps you can take. Do your best not to aggravate the speaker, but keep them talking as long as possible. Show your willingness to cooperate and try to get the following information:
- Where is the bomb?
- What kind of bomb is it?
- What does it look like?
- When is it going to go off?
Let the speaker talk uninterrupted as often as possible. As anyone who’s ever watched an action movie knows, if the villain is allowed to monologue they’ll often let something critical slip. Take notes while you listen and report everything you heard to emergency personnel. If possible, have a coworker call 911 while you keep the caller on the line.
Hostages
We’ve all seen the movies, so most people will have an idea of how a hostage situation might begin. It’s an average day at the bank, or the campus, or on the airplane. The protagonist is probably bored and in line for something. Then a handful of suit-wearing, mask-donning, gun-toting criminals press their way through the doors and shout “Everybody down, this is a hold up!” or something equally cliched.
Regardless of how it starts, there are things you can do if you find yourself being used as a bargaining chip in a violent crime. The first thing to remember is that police and local security all want to help you, and want you to leave the situation healthy and hale. Try to stay calm and listen to instructions, both from your captors, and your rescuers.
Unless told to, do not talk back to your captors. Do your best not to be the protagonist of this story. No witty quips, no cheeky insults, no provocation. Be invisible.
It may be tempting to take matters into your own hand and fight your captors. Resist the temptation. Remember, you do not want to be the main character of this story. The criminals are likely prepared for the eventuality, accustomed to violence, and better armed than you.
Avoid negotiating your freedom. A professional negotiator will be provided by emergency personnel. Unless, by sheer coincidence, you are a professional negotiator, say as little as possible. Drawing attention to yourself never ends well.
Why does this happen?
Most people can’t imagine picking up a weapon and actively causing mass harm. Well, maybe when we’re having a particularly frustrating day, but never seriously. So what causes some people to just “snap?”
Actually, ‘snapping’ is an inaccurate term. It implies a sudden change that comes about all at once. In reality, the process has likely taken months, if not years, to come to decisive action.
According to preventingcrime.ca the biggest factors in criminal behaviour are poverty, social environment, and family structures. All of these elements can contribute to feelings of inequality, desperation, and frustration. If someone doesn’t have the resources or capabilities to deal with these feelings they can escalate into criminal or violent action.
What can be done?
Universal programs that support families, give access to housing, and increase the health of our communities as a whole are considered the primary way to reduce crime and instability. As long as these opportunities are equally available to everyone they can mitigate and minimize the risks associated with poverty and family structure.
This kind of support can be represented on the individual level too. Keeping an eye out for warning signs: unpredictable behaviour, loneliness, or misdemeanors – especially in youth – is something we can all do. Include and support people who exhibit these signs, even if they’re not part of your usual circle. It’s incredible what a difference one person’s kindness can make.
Summary:
If you find yourself in a man-made emergency, stay calm and listen to authorities. Use common sense and distance yourself from the proceedings as soon as possible. If you are confronted, do what you can to avoid provocation and escape unharmed.
Thank you for reading and take care of yourselves!
This article was written by Zenia Platten – Author of Tethered and emergency preparedness professional.
Canadian MREs – What you need to know
2022 UPDATE: Canadian MREs are really difficult to find outside of the military. No one in Canada manufactures MREs complete with sides and heaters for commercial sale. (If we’re missing something PLEASE let us know in the comments! You will make our day!) Good news though! Total Prepare has the next best thing. We have worked tirelessly with a USA manufacturer to curate (and taste test) a menu that we think Canadians will love as much as we do. We’ll talk a little more about that later – first, let’s learn about MREs as a whole.
What is an MRE?
MREs or Meals Ready to Eat are a marvel of modern survivalist technology. With built in heaters and menus that are sure to please, they are popular with outdoorspeople, first responders, and the preparedness community.
MREs were developed in the USA as a way to feed soldiers on the move without weighing them down. Ensuring troops get 3000+ calories per day could be a challenge, especially when all that food needed to be hauled, sometimes on foot. Queue the MRE – the ultimate alternative to heavy canned goods.
Most survival meals are freeze dried, meaning they need to be reconstituted with water before they start to look like food. This allows them to have extended shelf lives (up to 25 years) but carrying all that extra water is impractical. MRE meals have some drink mixes/desserts that might ask for water, but for the most part they are ready to eat right out of the bag.
Don’t like your food cold? Me neither! That’s why most MREs are packed with something called a Flameless Meal Heater. These sachets of carefully selected chemicals react when exposed to water. Add an ounce or so of any water (snow works!) and watch it steam and bubble. You can watch it in action on our Youtube channel.
Each emergency meal is packed in sealed mylar pouches to protect them from any residue that the heater pack might create, so they are completely safe to eat after being heated in this way. They’re perfect for picnic’s too!
Why are MREs so difficult to get in Canada?
At this time there are no MRE manufacturers in our fine country* which means all product is imported. This isn’t unusual in our industry, however many suppliers of commercial MREs do something very special that can limit availability of this awesome product.
Many manufacturers have contracts in place with FEMA to supply them before any other customers. This ensures that if rations are needed in a time of crisis, they go to feed hungry mouths instead of sitting in someone’s bunker/basement.
Naturally, this kind of demand is difficult to predict. When wild fires, hurricanes, or flooding disrupt daily life for thousands, all stock can be diverted to feeding those with immediate need. This is a good thing… but can be inconvenient, especially for civilian customers. In some cases, MREs can be out of stock for all but a few months each year.
The GREAT news is that Total Prepare doesn’t have that problem. We now carry both the XMRE and Total Prepare MRE, both of which are in stock year round!
Unexpected things can still happen, of course, which is why we urge anyone interested in MREs not to wait for ‘one day’ but to stock up now, when you don’t need them. They have a 5 year shelf life so they’ll be ready to go for that summer camping trip or natural disaster.
This goes double for emergency service coordinators! Be ready to feed your crews. Canada experiences storms and forest fires every year and brave men and women are needed to support our communities. Stock up early so they will always have the fuel they need to get their life-saving work done.
*If there are, we haven’t heard of you! Contact us – we’re interested!
The Future of MREs at Total Prepare
Canadian MREs for the commercial market are the ultimate goal. Until those are possible, we’re working with a USA based manufacturer to provide a year-round supply of premium MREs. We have rigorously tested each part of our Total Prepare MREs, and we are proud of the menu we have curated. Our MREs have the highest calorie count per meal in the industry (1200+ calories per meal). We offer exceptional meal variety, hearty sides, and even a sweet treat to enjoy with each meal.
A personal note:
This writer’s favourite thing about the Total Prepare MRE is the flameless meal heater. Having tried quite a few brands, I had resigned myself to the fact that meal heaters stink. And I mean STINK. Not ideal in an office environment when you have forgotten a lunch! I was delighted when I fired up my first Total Prepare MRE and discovered that the meal heater didn’t release any bad smells. Plus, it’s the most powerful I’ve used so my food is always hot – just how I like it!
… okay, and the crunchy pepperoni bites. I REALLY like the pepperoni bites.
We do Workshops!

Sometimes it can be overwhelming to take on the task of emergency preparedness. Total Prepare wants to alleviate as much of that uncertainty and stress as we can! If we can make your personal or corporate preparedness simple, straight forward, and efficient, we’ve done our jobs perfectly.
If you’re in Victoria or Vancouver BC, we have additional in-person services that you can take advantage of. As of March 2019 we’re offering educational workshops! These presentations are about 45 minutes long, and we suggest leaving 15 minutes to handle questions afterwards. We cover the risks in the local area, focusing on earthquakes, tsunami, and fire. During the presentation participants learn what to expect during these emergencies, as well as best practices for surviving them safely. We also discuss the different kinds of emergency kits, the eight areas of preparedness, and what major seismic events have done to our region in the past.
Education is a massive part of preparing for any major life event, including disasters. The more you know about what to expect, and how to deal with it, the better off you will be. Stay informed and spread what you learn to others. Our workshops are run by our very own Zenia Platten (me!) who has been working enthusiastically in the emergency preparedness industry since 2015. Preparedness is near and dear to her heart and she is excited to share what she knows with you and your team.
The workshop does include a powerpoint, so having a projector/screen on location is preferred. Don’t have one? No problem! Let us know and we’ll bring our own along. If you are interested in participating in or hosting a preparedness workshop you can check out our page on them here, or contact us directly at 1-888-832-1733 or hello@totalprepare.ca. Thank you for reading and we look forward to hearing from you!
This article was written by Zenia Platten – Writer and emergency preparedness professional.


