Food saver food vacuum sealer surrounded by food
Food

How Food Savers Help You Store Food for Longer

Food savers, also known as vacuum sealers, are an excellent way to store food for extended periods, preserving its freshness and reducing waste. Whether you’re looking to save money, buy in bulk, or prepare for emergencies, food savers are a versatile tool. However, when considering emergency preparedness—especially for scenarios where power might be unavailable—it’s important to weigh the benefits and limitations of vacuum sealing against other long-term food storage options like freeze-dried foods and MREs.

In this blog post, we’ll explore:

  • What kinds of foods can be stored with a food saver
  • How long vacuum-sealed foods last
  • Why food savers are a great addition to your emergency plan
  • How they compare to freeze-dried foods and MREs

Food saver food vacuum sealer surrounded by food

What Foods Work Well with a Food Saver?

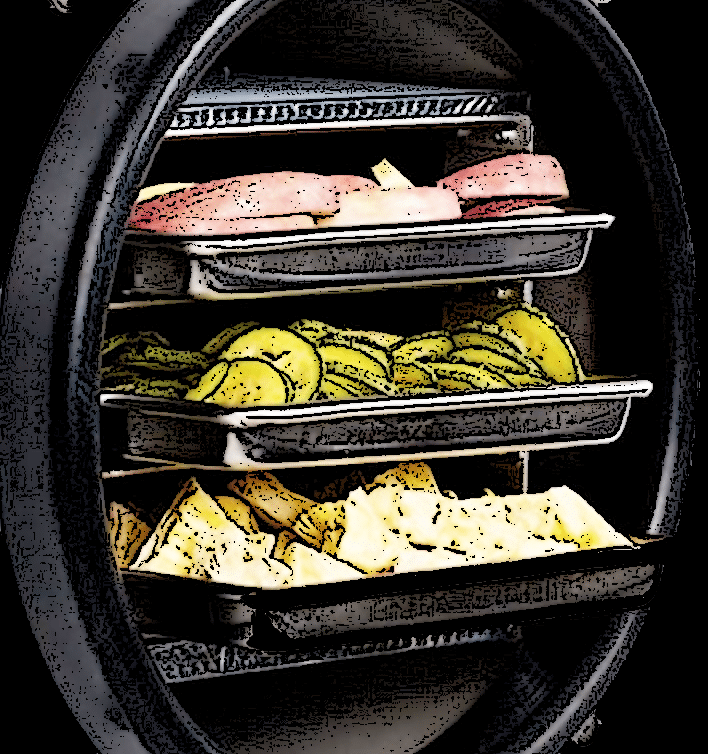
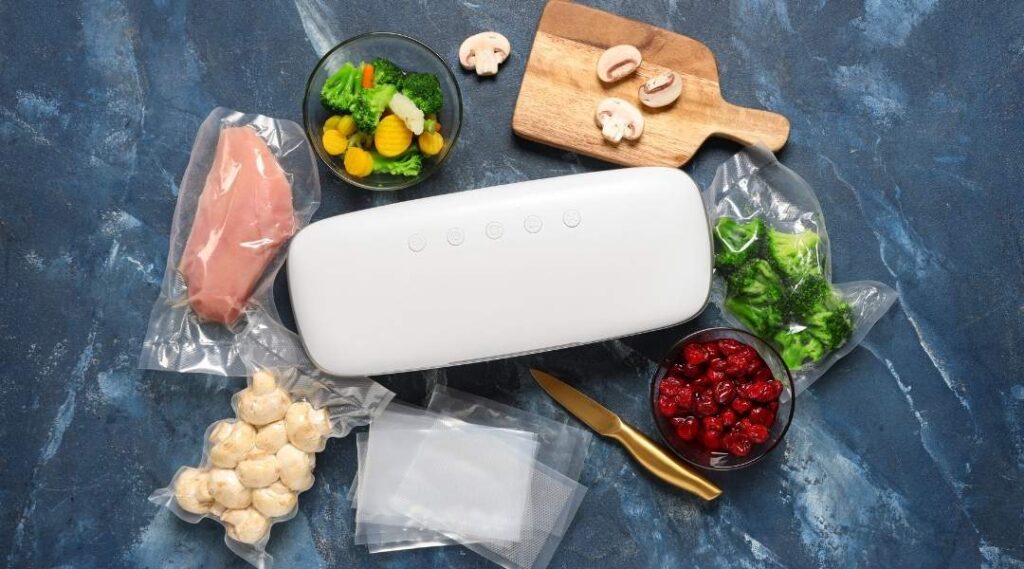
Food savers are incredibly versatile, enabling you to store a wide variety of foods:

  • Meats and Fish: Vacuum-sealing raw or cooked meats prevents freezer burn and extends their shelf life. Frozen vacuum-sealed meat can last 1-3 years, far longer than traditionally packaged meat.
  • Vegetables and Fruits: While fresh produce should be blanched or frozen before sealing, vacuum-sealing extends their storage life by up to 3 years.
  • Cheese: Vacuum-sealed blocks or slices of cheese resist mold and drying out, staying fresh for months.
  • Dry Goods: Grains, rice, pasta, and nuts remain protected from moisture, lasting 6 months to a year or more.
  • Prepared Meals: Portioning and vacuum-sealing pre-cooked meals or leftovers allows you to enjoy them later with minimal prep.

How Long Does Vacuum-Sealed Food Last?

By removing air, vacuum sealers significantly extend the shelf life of food:

  • Meats and Fish: Last 1-3 years in the freezer compared to 6 months with conventional storage.
  • Vegetables and Fruits: Extend from several months to 1-3 years when properly prepared and vacuum-sealed.
  • Grains, Nuts, and Snacks: Typically last 6 months to 1 year.

These extended storage times make vacuum-sealing an excellent option for both everyday use and short-term emergency preparedness.

food saver sealing beef


Are Food Savers Good for Emergency Preparedness?

Food savers play a valuable role in emergency preparedness, particularly for short-term scenarios where refrigeration or freezing is available. They help:

  • Preserve bulk food purchases for longer periods.
  • Reduce food waste by sealing leftovers or perishable items.
  • Provide easy, pre-portioned meals that save time in an emergency.

However, vacuum-sealing has limitations in emergencies involving prolonged power outages. If your freezer loses power for an extended period, vacuum-sealed food may spoil. For these situations, alternatives like freeze-dried foods and MREs offer better reliability.


Freeze-Dried Foods vs. MREs vs. Food Savers

When planning for emergencies, it’s important to understand how vacuum-sealed foods compare to freeze-dried foods and MREs:

  • Freeze dried strawberries from Augason FarmsFreeze-Dried Foods:
    • Shelf Life: Up to 25 years.
    • Storage Needs: Can be stored at room temperature.
    • Preparation: Add to boiling water, stir, and wait.
    • Best For: Long-term storage, evacuation scenarios, and extended power outages.
  • MREs (Meals Ready-to-Eat):
    • Total Prepare MRE
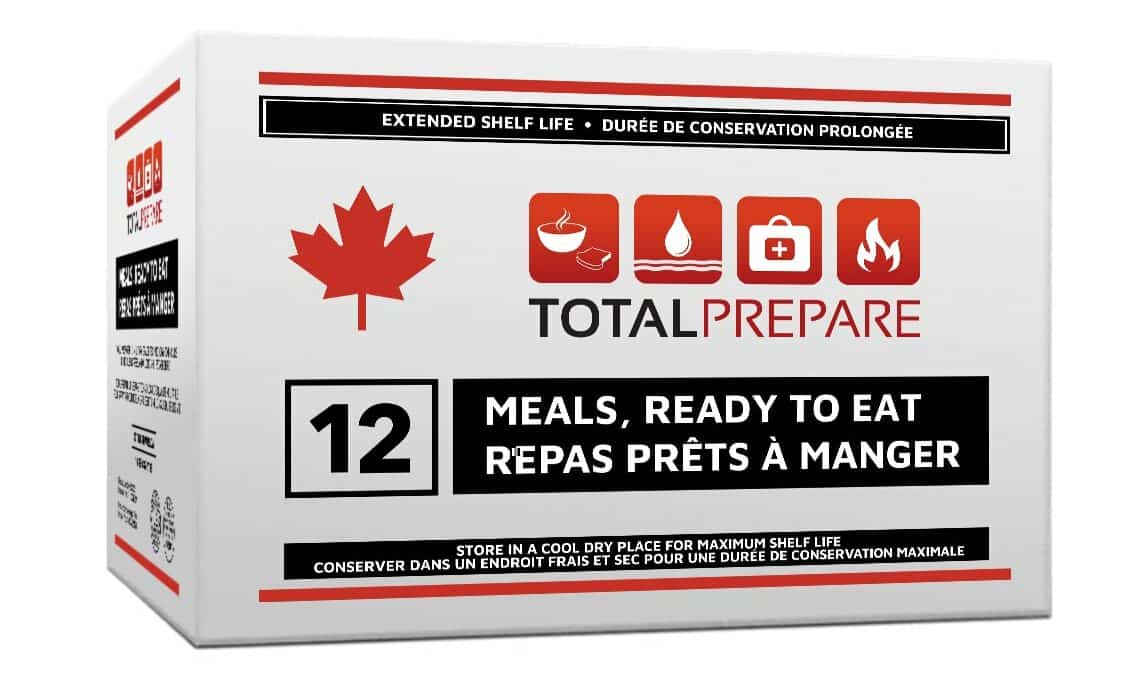
Shelf Life: 5-7 years.
    • Storage Needs: Compact and room-temperature storage.
    • Preparation: No cooking needed – meals are ready to eat.
    • Best For: Grab-and-go emergencies, camping, and disaster response.
  • Vacuum-Sealed Foods:
    • Shelf Life: Varies; up to 3 years for frozen items.
    • Storage Needs: Usually requires refrigeration or freezing.
    • Preparation: Often pre-cooked or ready to heat.
    • Best For: Everyday use and short-term emergencies.


Finding the Right Balance

While food savers are not ideal for long-term, power-independent storage, they remain a fantastic tool for daily use and as part of a layered emergency plan. Combining vacuum-sealed foods with freeze-dried options and MREs ensures you’re prepared for a variety of scenarios—from short-term disruptions to long-term evacuations.

By understanding the strengths and limitations of each storage method, you can build a comprehensive food preparedness strategy that meets your needs. Whether you’re saving money on groceries or preparing for the unexpected, food savers are a valuable addition to any kitchen or emergency kit.

Freeze Dryer
Food

How to Freeze Dry Food

Freeze-drying has become a buzzword in food preservation, offering long shelf life, lightweight storage, and exceptional nutrient retention. If you’ve ever wondered how to freeze dry food at home or are considering buying a home freeze dryer, this guide is for you! We’ll walk through the freeze-drying process, outline how home freeze-drying machines work, and discuss why pre-made freeze-dried foods might be the more practical choice.

People loading a tray of food into an industrial freeze drier


The Freeze-Drying Process: Science at Work

Freeze-drying, or lyophilization, removes moisture from food while preserving its structure and nutrients. The process has three key steps:

  1. Freezing: The food is frozen at ultra-low temperatures, turning water content into ice.
  2. Sublimation: The frozen food is placed in a vacuum chamber, where the ice transitions directly from solid to gas without melting.
  3. Sealing: The food is packed in airtight containers or Mylar bags with oxygen absorbers to ensure freshness for years to come.

The result? Lightweight, shelf-stable food that retains its original flavor, texture, and nutritional value when rehydrated.


Using a Home Freeze Dryer: Steps to FollowFreeze Dryer

Modern home freeze-drying machines make this process possible for anyone. Here’s how most machines work:

  1. Prepare Your Food: Wash, chop, or cook your food as needed. Raw foods like fruits or cooked meals like stews can be freeze-dried.
  2. Load the Trays: Spread your food evenly on the freeze dryer trays, ensuring no pieces overlap.
  3. Start the Machine: Set your machine to the appropriate settings. Most devices freeze the food first, then begin the sublimation process.
  4. Monitor the Process: Depending on the food and machine, this can take 20–40 hours. Machines often notify you when the cycle is complete.
  5. Store the Food: Seal the finished product in Mylar bags with oxygen absorbers for long-term storage.

While freeze-drying machines are more user-friendly than ever, they come with some challenges.


DIY Freeze-Drying: The Challenges

While home freeze-drying is fascinating, it has drawbacks that often make pre-made freeze-dried foods a better option:

  • High Initial Cost: Home freeze-drying machines can cost thousands of dollars, making it a significant investment. Unless you’re planning to do a LOT of freeze drying, it may be more cost effective to persue other avenues.
  • Time-Consuming: Each batch can take over a day, limiting how much food you can prepare at once.
  • Storage: Home freeze dryers are one of the larger countertop appliances you can get. Carefully consider where you will store it, and where it will be while in operation. Small units measure about 27 x 18 x 22″
  • Energy Use: Freeze dryers consume significant electricity, increasing your utility bills.
  • Learning Curve: It can take trial and error to perfect the process, leading to wasted food and frustration.

When you consider the time, expense, and effort, pre-made freeze-dried foods offer incredible convenience without the hassle.


Why Choose Pre-Made Freeze-Dried Foods?

Instead of committing to a DIY freeze-drying setup, consider our wide range of freeze-dried foods. These products are professionally prepared and packaged, ensuring optimal taste, texture, and shelf life. From fruits and vegetables to complete meals, we have options for every need—whether it’s emergency preparedness, camping, or daily convenience.

With pre-made options, you’ll save time, money, and effort, all while enjoying the same high-quality food you’d expect from home freeze-drying—without the steep learning curve.


Final Thoughts

Freeze-drying is an incredible way to preserve food, but it’s not always practical for home use. Whether you’re an emergency prepper, outdoor enthusiast, or busy parent, pre-made freeze-dried foods offer unmatched convenience and reliability.

Curious about our selection? Explore our freeze-dried food products today and let us handle the hard work so you can focus on enjoying your meals!

fog over a city skyline.
Business, Emergency Planning

Preparing for Emergencies: Building Resilient Organizations

Emergencies are inevitable, but their impact can be mitigated through proactive planning and strategic preparation. For organizations, the stakes are high. Beyond safeguarding lives, a robust emergency preparedness plan protects operations, reputation, and resources. This guide outlines the critical steps for organizational emergency preparedness, offering insights that even seasoned emergency managers will find valuable.

1. Understand Your Risks
Every organization faces unique risks based on its industry, location, and operational scope. Conduct a thorough risk assessment to identify potential hazards, such as:

  • Natural disasters (earthquakes, floods, hurricanes)
  • Technological incidents (cyberattacks, utility failures)
  • Human-made crises (active threats, workplace violence)

Once risks are identified, prioritize them based on likelihood and potential impact. Tools like Canada’s All-Hazards Risk Assessment framework can streamline this process.

2. Build a Comprehensive Emergency Plan
An effective plan is more than a checklist; it’s a dynamic framework that evolves with your organization. Key components include:

  • Communication Protocols: Establish who communicates what, to whom, and how. Include backup methods for redundancy.
  • Evacuation and Shelter Plans: Map out escape routes and identify safe locations. Ensure accessibility for all employees.
  • Resource Allocation: Assign responsibilities, designate emergency kits, and ensure critical infrastructure is protected.
  • Recovery Strategies: Detail steps to resume operations post-crisis, including data recovery and stakeholder communication.

3. Train and Engage Your Team
Preparedness is a team effort. Regular training ensures every employee understands their role in an emergency.

  • Conduct tabletop exercises to simulate scenarios and test decision-making.
  • Offer CPR, first aid, and fire safety training.
  • Engage employees with regular drills to build confidence and familiarity.

For emergency managers, this also includes leadership training to maintain calm and make informed decisions under pressure.

4. Partner with External Resources
Collaboration is key. Forge relationships with local emergency services, government agencies, and nearby organizations.

  • Participate in regional drills and share best practices.
  • Consider joining mutual aid agreements to pool resources during crises.
  • Stay informed with updates from national bodies like Public Safety Canada.

5. Evaluate and Adapt
Post-incident reviews are crucial for growth. After an emergency or drill, debrief with your team to identify what worked and what didn’t. Update your plan accordingly to address any gaps.

Preparedness is an ongoing journey, not a destination. By understanding risks, planning comprehensively, and fostering a culture of readiness, organizations can weather emergencies with resilience. Emergency managers play a pivotal role in guiding this process, ensuring their teams are equipped to face any challenge.

Ready to enhance your organization’s emergency preparedness? Contact us for customized solutions to meet your unique needs.

Woman comforting youth in space blanket
Shelter

Everything You Need to Know About Space Blankets

When it comes to lightweight, portable, and effective tools for survival and emergency preparedness, few items rival the emergency space blanket. Whether you’re a seasoned adventurer, a casual camper, or someone building an emergency kit for your home or car, these shiny, metallic blankets are worth considering. But what makes them so special, and how do they work? Let’s dive into the science, uses, and tips for getting the most out of these compact lifesavers.

What Are Emergency Space Blankets?

Emergency space blankets, also known as Mylar blankets or thermal blankets, are ultra-thin sheets made of heat-reflective material. Originally developed by NASA for the U.S. space program, these blankets are designed to reflect up to 90% of your body heat back to you.

Their lightweight and foldable design make them easy to pack, while their durable construction ensures they can withstand various environmental conditions. You’ll often find them in first aid kits, survival gear, and even at marathons.

Child using space blanket

How Do They Work?

The magic of space blankets lies in their material. Mylar is a type of polyester film coated with a thin layer of metallic alloy. This layer reflects radiant heat—the energy your body naturally emits—back toward you, helping you retain warmth.

Unlike traditional blankets, which insulate by trapping air, space blankets primarily rely on reflection to keep you warm. While they won’t generate heat themselves, they’re incredibly effective in reducing heat loss from radiation, convection, and evaporation.

When and Where to Use Space Blankets

  1. In Emergency Situations
    Space blankets are essential in situations where warmth is critical—such as being stranded in your car during winter, waiting for rescue, or treating someone in shock or hypothermia.
  2. Camping and Hiking
    Unexpected weather changes can leave you cold and wet. Space blankets provide an extra layer of protection, whether used as a makeshift shelter, ground cover, or even a windbreaker.
  3. In Survival Kits
    Compact and versatile, space blankets are a must-have for bug out bags and 72-hour emergency kits.
  4. First Aid Applications
    Beyond warmth, these blankets can act as a sterile surface for injuries or be used to signal for help thanks to their reflective surface.
  5. Disaster Response
    Emergency responders often distribute space blankets after earthquakes, floods, or fires to help displaced individuals retain body heat.

Woman comforting youth in space blanket

Creative Uses for Space Blankets

  • Waterproofing: Use them as a tarp to keep supplies dry or cover yourself during rain.
  • Signal Mirror: The reflective surface can catch sunlight to signal rescuers.
  • Shelter Building: Combine a space blanket with paracord to create an effective rain or sun shield.
  • Food Preparation: Use them to reflect heat when cooking with solar ovens.
  • Gardening: Some people even use space blankets as ground covers to retain soil warmth for plants.

Tips for Using Space Blankets

  1. Avoid Tears: Mylar is strong but can puncture if mishandled. Carry duct tape for quick repairs.
  2. Combine with Other Gear: Layering a space blanket over or under a sleeping bag enhances its effectiveness.
  3. Secure in Windy Conditions: Use rocks, clips, or stakes to hold the blanket in place.
  4. Be Mindful of Condensation: Prolonged use can trap moisture. Ventilate as needed to stay dry.

Are There Any Downsides?

While space blankets are highly effective in short-term emergencies, they are not designed for extended use or extreme environments. They can tear under heavy stress, don’t breathe well, and don’t insulate as effectively as wool or down when used alone.

Stocking Up on Space Blankets

At Total Prepare, we believe every kit should include at least one emergency space blanket. They’re cost-effective, multipurpose, and potentially life-saving. They fit anywhere, and at $2, why not keep one in your purse, car, and at the office?

Final Thoughts

Emergency space blankets may be simple in design, but their potential is vast. Whether you’re preparing for unexpected weather, building a survival kit, or planning your next outdoor adventure, having one of these reflective blankets on hand can make all the difference.

Ready to add one to your kit? Shop here. Stay safe, stay prepared!

'Earthquake Ready?' sign
Earthquakes

Are We Ready for “The Big One”? Understanding the Impact of a Megathrust Earthquake in BC

It’s a chilling thought for anyone living in British Columbia: what would happen if a huge earthquake struck? The threat of a “megathrust earthquake”—a massive quake caused by the shifting of tectonic plates—looms large over cities like Vancouver and Victoria. Known as “The Big One,” experts say this earthquake could have a magnitude of 9.0 or higher and would cause intense damage. So, let’s explore what we might experience if it happens, why it’s likely, and what we can do to prepare.

What Will Happen Geographically?

British Columbia sits along the Cascadia Subduction Zone, where the Juan de Fuca and North American tectonic plates meet. This zone stretches about 1,000 kilometers, from Vancouver Island to Northern California. When the stress builds up enough and one plate suddenly slips under the other, it triggers an enormous earthquake. The ground could shake for several minutes, leading to landslides, ground liquefaction (where the ground acts more like a liquid than a solid), and possible tsunamis. Coastal areas, including Vancouver Island, would be especially vulnerable to flooding from these waves.

Impact on Homes and Businesses

In cities like Vancouver and Victoria, where buildings vary widely in age and design, the damage could be severe. Older structures, especially those built before modern seismic codes, may collapse entirely or suffer significant structural damage. Homes built on soft soil could sink or tilt, and high-rise buildings might sway, potentially causing glass to shatter and hazardous debris to fall. Businesses in these areas would be disrupted, with many unable to reopen for weeks or even months. Bridges, roads, and railways might be unusable, making it difficult for emergency crews to move around and for people to evacuate.

Seismic building codes have been around since the 1950s, but have undergone many changes as our understanding of earthquakes grew. Even modern building standards do not make a building earthquake-proof. The Office of Housing and Construction Standards in BC says:

“Seismic provisions in the code are intended to protect life and safety, allowing people to escape buildings even when damaged.  A new building designed to code is designed to withstand a moderate earthquake without significant structural damage and a major earthquake without collapsing.”

How Long Will Recovery Take?

Rebuilding after a megathrust earthquake would be a huge challenge. Restoring water, power, and transportation services could take weeks or even months. In Christchurch, New Zealand, which experienced a devastating earthquake in 2011, parts of the city were uninhabitable for years, and the recovery is still ongoing over a decade later. Given the size of British Columbia’s population and the complexity of Vancouver and Victoria’s infrastructure, recovery here could be equally drawn out, depending on the severity of the quake and the damage caused.

Christchurch church before and after the earthquakeReal-World Examples

Christchurch is one of the best comparisons for BC. The city had to cope with severe structural damage, loss of life, and a long-term rebuilding process. Christchurch also sits on a tectonic fault, similar to BC, and it showed how long and challenging recovery can be, especially in terms of infrastructure and community support. Like Christchurch, BC will likely need to rebuild many structures, roads, and utilities from scratch. Other examples include Japan’s 2011 Tōhoku earthquake and tsunami, which showed the kind of widespread impact a megathrust quake can have, though any tsunami we get here will be much smaller than the one experienced in Japan. (Thank goodness!)

Is BC Prepared?

British Columbia has taken steps to prepare for an earthquake, but there’s always more that can be done. Seismic upgrades have been made to many public buildings and bridges, and the government has invested in early warning systems to alert residents and officials. Still, retrofitting buildings is costly and time-consuming, and many homes and businesses may not have adequate reinforcements to withstand a major quake.

Are Most Families Prepared?

While there’s growing awareness about earthquake preparedness, many families may not be fully prepared. Some have emergency kits and a family plan, but experts suggest having supplies like food, water, and medical essentials for at least 72 hours—though some recommend a week or more, considering the time it may take for help to arrive. Unfortunately, according to a 2018 survey,  only some households have made these preparations, even with the risks.

Woman practicing Drop, Cover, and Hold On.

How to Get Prepared

Preparing for a major earthquake might sound overwhelming, but some straightforward steps can make a big difference:

  1. Make or buy an emergency kit with essentials like food, water, medication, a flashlight, and a first-aid kit. Ideally, have enough to last at least 72 hours. Don’t want to DIY it? Shop kits here.
  2. Create a family emergency plan so everyone knows what to do and where to meet after a quake. You can find a free plan template here.
  3. Secure heavy items in your home, like bookshelves, TVs, and appliances, to reduce injury risks.
  4. Take part in earthquake drills like the annual Great British Columbia ShakeOut, which helps people practice safe responses to earthquakes. Or watch our video on how to practice your own family emergency drill.

2 Person Family Prep Survival Kit

Why Haven’t We Had a Big Earthquake in a Long Time?

The Juan de Fuca and North American tectonic plates are pressing against one another, with one slowly sliding beneath the other. Usually, this movement is manageable, but in our case, the plates are ‘locked’ together—meaning we’re essentially stuck. Even though these plates can’t move freely, they continue to push, building up a tremendous amount of pressure with nowhere to go. This pressure will keep accumulating until it reaches a breaking point, at which time it will release all at once, triggering an enormous earthquake. This “locking” effect is why we haven’t had many large quakes recently, but when that pressure finally gives way, we’ll feel the full force of a massive event.

The History of Earthquakes in This Area

The west coast of North America has a history of seismic activity dating back thousands of years, as shown by Indigenous oral histories and scientific evidence of past tsunamis. Smaller earthquakes happen frequently, reminding us of the region’s volatility. These smaller quakes help relieve stress but aren’t enough to prevent a megathrust event from eventually occurring.

What Are the Odds?

While there’s no way to know exactly when “The Big One” will happen, researchers estimate a 10-15% chance of a major quake along the Cascadia Subduction Zone in the next 50 years. This may sound low, but considering the massive potential impact, it’s something everyone should take seriously.

Final Thoughts

Although we can’t prevent an earthquake, we can reduce the damage it causes by preparing ourselves, our homes, and our communities. By understanding the risks, learning from other places that have been through similar events, and staying informed, we can build a more resilient BC. Preparedness might feel overwhelming, but taking even small steps now can make a huge difference when “The Big One” eventually hits.

Emergency Command Centre (EOC)
Emergency Planning

Emergency Response Systems: Comparing NIMS in the U.S. and Canada’s Approach

When emergencies happen, such as natural disasters or major accidents, governments need a way to coordinate their response. Both the United States and Canada have systems in place to handle these situations, ensuring everyone knows their role and can act quickly. In the U.S., this system is called the National Incident Management System (NIMS). Canada has a similar system, but it uses a combination of the Incident Command System (ICS) and other emergency plans.

Let’s break down how these systems work and compare them.

The 5 Pillars of Incident Command Systems (ICS) in actionWhat is NIMS in the U.S.?

The National Incident Management System (NIMS) is the U.S. framework for handling emergencies of all kinds. Whether it’s a small event, like a car accident, or a large disaster, like a hurricane, NIMS makes sure everyone involved in the response works together smoothly. NIMS has several components:

  1. Incident Command System (ICS): This is a core part of NIMS, and it’s used to manage the on-the-ground response during an emergency.
  2. Resource Management: NIMS ensures that necessary supplies and equipment are coordinated and sent to the right places.
  3. Communications: The system also makes sure that different agencies can talk to each other effectively, even if they come from different levels of government or the private sector.

NIMS is designed to be flexible, meaning it can scale up or down depending on the size of the emergency. It’s not just used by local governments, but also by federal, state, and tribal authorities. Private companies and non-governmental organizations (NGOs) can also be part of the system.

How Does Canada Manage Emergencies?

Canada’s approach to managing emergencies is similar but does not have a system exactly like NIMS. Instead, Canada relies on the Incident Command System (ICS) as its main tool for managing emergency responses. Here’s how it works:

  • ICS Canada: The Incident Command System in Canada is very similar to the U.S. version. It is a standardized system that helps manage the response to any type of emergency. It allows different organizations to work together by defining clear roles and responsibilities, such as having an Incident Commander in charge of operations.
  • Federal Emergency Response Plan (FERP): This is Canada’s national plan for large-scale emergencies. The FERP steps in when an emergency goes beyond what a province or territory can handle. The plan ensures the federal government coordinates with provinces, municipalities, and other agencies during these major incidents.
  • Provincial and Territorial Plans: Each province and territory in Canada has its own emergency management plans, which follow ICS principles. These plans make sure that all levels of government, from local to federal, are working together.

Canada’s system also uses an all-hazards approach, meaning it is designed to respond to any type of emergency, from natural disasters like floods to industrial accidents or even public health crises.

Key Differences Between NIMS and Canada’s Approach

The biggest difference between the U.S. and Canada is that the U.S. uses NIMS as a national, all-encompassing system, while Canada relies heavily on ICS and the Federal Emergency Response Plan (FERP). Here are some more specific differences:

  • NIMS is a larger system that includes more than just ICS. It also covers resource management, communications, and ongoing coordination.
  • In Canada, ICS is the main system used to manage emergencies, but it works alongside other federal and provincial plans like FERP.

Both countries use systems that can scale up depending on the size of the emergency, and both follow the ICS structure, which makes it easier for them to cooperate during cross-border incidents, such as a wildfire or pandemic that affects both countries.

Conclusion

While the U.S. and Canada have different names and structures for their emergency management systems, they both share a common goal: to provide a coordinated and effective response during emergencies. The U.S. NIMS integrates various components, including ICS, to manage everything from small incidents to national disasters. Canada, on the other hand, uses ICS Canada and the Federal Emergency Response Plan to ensure coordination at all levels of government. These systems allow each country to respond quickly, ensuring the safety of their citizens.

By understanding how these systems work, we can see how both nations are prepared to handle emergencies, both large and small.

Skeletons sharing some halloween safety tips
News, Zombies

Halloween Safety Tips for a Fun and Spooky Night

Halloween is just around the corner, and while it’s a time for spooky fun, costumes, and candy, it’s also important to stay safe. Whether you’re trick-or-treating with kids, handing out candy, or attending a party, following these Halloween safety tips can help ensure a memorable night without any (unintentional) scares.

Two kids holding hands at Halloween.

1. Plan Your Route in Advance

  • If you’re trick-or-treating, map out a route ahead of time. Stick to familiar neighborhoods with good lighting and sidewalks.
  • Consider using a GPS or map app to keep track of your location if you plan to explore new areas.

Toddler in a witch hat and sunglasses giving two thumbs up for our Halloween Safety tips

2. Choose Safe and Visible Costumes

  • Visibility is Key: Use reflective tape on costumes and treat bags, and bring flashlights or glow sticks to help kids stand out to drivers.
  • Avoid Masks That Obscure Vision: Masks can make it harder to see, so opt for face paint or makeup instead.
  • Check the Fit: Make sure costumes and shoes fit well to prevent tripping or falling.

A group of trick or treaters receiving candy from a very nice lady

3. Practice Trick-or-Treating Etiquette

  • Travel in Groups: Children should be accompanied by an adult or travel in groups. This is not only safer but makes for more fun.
  • Respect Neighbors: Only visit homes with porch lights on, and remind kids to be polite and respectful when receiving treats.
  • Keep to the Sidewalks: Walk, don’t run, and stay on sidewalks whenever possible. If there aren’t sidewalks, walk facing traffic and stay as close to the curb as possible.

4. Inspect Treats Before Enjoying Them

  • Before digging into the candy, inspect it at home in good lighting. Discard any treats that are unwrapped, have torn packaging, or look suspicious.
  • If your child has allergies, carry an epinephrine auto-injector and review the treats together to avoid potential allergens.

A couple in the front seat of their car, while a zombie woman waits in the back seat (they're driving her to a lovely costume party.)

5. Drive Extra Cautiously

  • If you’re driving on Halloween night, be extra alert for trick-or-treaters. Kids may be excited and dart across the street unexpectedly.
  • Slow down and watch for children at intersections, on medians, and in driveways. Be especially cautious in residential areas.

6. Light Up the Night Safely

  • Instead of candles, use battery-operated LED lights in jack-o’-lanterns and decorations to prevent fire hazards.
  • For those who will be out after dark, flashlights and glow sticks are great ways to stay visible without the risk of open flames.

7. Prepare Your Home for Trick-or-Treaters

  • Make sure walkways are clear of obstacles like garden hoses, decorations, or toys that could cause someone to trip.
  • If you have pets, consider keeping them in a separate room to prevent them from getting overly excited or anxious when visitors arrive.

By following these Halloween safety tips, you can enjoy a night filled with treats, spooky costumes, and lots of fun—without any unexpected frights! Stay safe, stay seen, and have a spooktacular Halloween!

Looking for another Halloween read? Check out last year’s post on Preparing for a Zombie Apocalypse.

The 5 Pillars of Incident Command Systems (ICS) in action
Business, Emergency Planning

The 5 Major Functions of the Incident Command System (ICS)

In times of crisis, whether it’s a natural disaster, industrial accident, or another type of emergency, having a clear and coordinated response is critical to saving lives and minimizing damage. That’s where the Incident Command System (ICS) comes into play. ICS is a standardized approach to managing incidents, ensuring that responders from different agencies or sectors can work together seamlessly. Understanding how ICS operates can be crucial for businesses, emergency planners, and first responders.

At its core, ICS breaks down emergency response into five key functional areas:

1. Command

ICS Vest Green back ref letters

The Command function holds the highest level of responsibility in an incident. This role is filled by the Incident Commander, who oversees all operations and is responsible for the overall management and direction of the response. The Incident Commander sets objectives, makes decisions, and ensures that all resources are coordinated effectively.

Think of Command as the leadership team, making high-level decisions and guiding the other functional areas. For large-scale incidents, a Command staff may also include a Public Information Officer, Safety Officer, and Liaison Officer to assist in communications, safety, and interagency coordination.

2. Operations

A man in an ICS vest - front and back shot

Our warehouse manager, Jordan, very patiently modelling for us.

The Operations function focuses on the tactical response to the incident. This is where the action happens. Whether it’s evacuating affected areas, conducting search-and-rescue missions, or providing medical care, the Operations team is on the front lines, carrying out the tasks needed to achieve the incident’s objectives.

Operations personnel are responsible for the “doing” part of the response, using resources efficiently and ensuring that field personnel are executing the plans set by the Incident Commander.

3. Planning

ICS Vest blue back ref letters

Without a solid plan, emergency response efforts can quickly become chaotic. The Planning function is tasked with creating that plan, based on information collected and analyzed from the incident. This includes identifying current and future needs, tracking resources, and developing the Incident Action Plan (IAP) for each operational period.

The Planning function is also responsible for gathering intelligence and making sure that all responders have up-to-date, accurate information about the evolving situation. Planning helps ensure that responders can anticipate challenges and be prepared to adapt as the incident unfolds.

4. Logistics

ICS Vest yellow back ref letters

In an emergency, having the right supplies and resources available is vital. The Logistics function ensures that all personnel have what they need to perform their duties safely and efficiently. This includes providing equipment, transportation, food, water, medical supplies, and communication tools, as well as managing facilities like shelters or staging areas.

Logistics is the backbone of support for the response, ensuring that responders can focus on their tasks without worrying about where their next meal is coming from or if they have the right tools for the job.

5. Finance/Administration

ICS Vest grey front ref letters

Behind every incident response, there’s a need to track costs, manage contracts, and handle other financial matters. The Finance/Administration function handles this crucial support. This team is responsible for tracking expenditures, managing timekeeping, and processing claims and compensation related to the incident.

Finance and Administration also ensure that the incident remains compliant with legal and regulatory requirements, and that all financial records are kept up to date for future auditing and reimbursement purposes.


Why is ICS Important?

The Incident Command System is designed to provide a structured, yet flexible, approach to managing emergencies. By breaking down response efforts into these five functions, ICS allows for clear leadership, accountability, and coordination across multiple agencies and sectors. Whether you’re managing a small incident or a large-scale disaster, ICS provides a standardized system that helps responders stay organized and efficient.

For businesses, understanding the basics of ICS can be invaluable, especially when working with emergency services or preparing for crises that could impact your operations. It’s a system designed to bring clarity to chaos, ensuring that everyone knows their role and that all efforts are coordinated to achieve the best possible outcome.

light stick / glow stick being used to read
Shelter, Survival

The Glow Stick: More Than Just a Fun Toy

Glow sticks are a simple but useful tool that can brighten up a variety of situations. Whether you’re preparing for an emergency, attending a party, or heading out on an adventure, these portable light sources can come in handy in many ways.

light stick being used to read

What Are Glow Sticks and How Do They Work?

These small light devices work without the need for batteries or electricity. Inside, there are two chemicals separated by a small vial. When the stick is bent, the vial breaks, allowing the chemicals to mix and create light through a reaction called chemiluminescence. This glow can last for hours, making it a reliable light source in low-light conditions.

Are They Safe to Use?
One common concern is whether these products are safe, especially around children and pets. Thankfully, most glow sticks are non-toxic. While it’s a good idea to avoid breaking the outer casing, the chemicals inside are not harmful if they come into contact with skin. In case of a spill, simply wash off the liquid with soap and water.

Why You Should Have These in Your Emergency Kit

Glow sticks aren’t just for fun. They are an essential tool for emergency preparedness. In the event of a power outage or natural disaster, they provide safe, reliable light when flashlights or candles may not be an option. Since they don’t require electricity or batteries, you can count on them even when other light sources fail.

Key Benefits for Emergency Kits:

  • Long-lasting light: Many glow sticks provide up to 8 hours of continuous light, which is ideal for overnight use during blackouts or in emergency situations.
  • Non-flammable: Since they don’t generate heat, these light sources are a safe alternative when candles or other flame-based lighting options could pose a fire risk.
  • Weatherproof: They’re designed to work in all conditions, including rain or wind, making them a dependable light source for outdoor adventures or during severe weather.

More Than Just Emergency LightingLight stick / glow stick

While they are perfect for emergencies, glow sticks are also a fun addition to outdoor activities and night-time events. They’re lightweight and easy to carry, making them a great companion for camping, hiking, or evening walks.

Practical Uses in the Outdoors
For those who love outdoor adventures, these light sticks can be used to mark a trail, illuminate a campsite, or even signal others from a distance. Since they don’t rely on batteries, they’re an excellent backup light when you’re off the grid.

Safety First
Glow sticks are often used by joggers, bikers, and walkers at night to improve visibility. By attaching one to your backpack or clothing, you can ensure that you are seen in low-light conditions, which is especially important for road safety.

Creative Uses for Glow Sticks

Beyond their practical uses, glow sticks are popular for parties, festivals, and celebrations. Their bright, colorful glow adds a fun touch to any event. They’re also great for making quick and easy party decorations.

Ideas for Creative Fun:

  • DIY Lanterns: Drop one into a water bottle or jar to create a glowing lantern, perfect for nighttime events or camping trips.
  • Party Decor: Use them to light up centerpieces, tables, or walkways at an outdoor event or party.
  • Halloween Safety: Instead of candles, place a few inside pumpkins to create a spooky, long-lasting light source that won’t blow out in the wind.

How Long Do They Last?

Most glow sticks provide light for 8 to 12 hours, though this depends on the temperature and brand. Cooler temperatures may extend the duration of the glow, while warmer conditions might cause it to fade sooner. Even though they are single-use, they have a long shelf life, making them a great addition to your emergency supplies or for any spontaneous adventure.

Where to Buy Light Sticks

Total Prepare carries these handy emergency items. You can find them here. For larger/organizational orders, contact our team at hello@totalprepare.ca for a custom quote.

Empire State Building barely visible through smoke June 7 2023
Emergency Kits, Fire, News, Severe Weather & Floods

The Real-World Importance of Emergency Kits: Lessons from Canada’s 2023 Disasters

In recent years, Canada has been marked by a series of unprecedented natural disasters, from devastating wildfires to severe flooding, resulting in multi-day disruptions for hundreds of thousands of people. These events underscore a crucial point: preparedness, particularly having an emergency kit and food storage, is not just a theoretical precaution—it’s a real-world necessity that can make the difference between comfort and chaos when disaster strikes.

Wildfires burning along the West Kiskatinaw River June 7 2023

Unprecedented Wildfire Disasters

The Canadian wildfires of 2023 were nothing short of historic, becoming the country’s top news story for the year. Across multiple provinces, including Alberta, British Columbia, Quebec, and the Northwest Territories, a staggering 17.5 million hectares of forest were consumed by fire, making it the worst wildfire season on record. The scale of these fires was immense, displacing more than 200,000 people and blanketing regions in thick, hazardous smoke that reached as far as the United States.

One of the first communities to be impacted was Evansburg, Alberta, where residents were evacuated as early as April 29 due to fires rapidly advancing through dried-out forests. Within weeks, major cities like Halifax and Yellowknife were facing their own existential threats from the flames. On August 16, 2023, Yellowknife’s 20,000 residents were ordered to evacuate as wildfires closed in on the city. This mass exodus led to airport lines filled with people waiting for emergency flights, while others embarked on marathon road trips to safety in Alberta. These residents were only allowed to return three weeks later when the immediate threat had passed, but the emotional and economic toll would take much longer to heal.

Nova Scotia’s experience was particularly alarming. On May 29, wildfires erupted around Halifax, Canada’s East Coast capital. The rapid spread of the fires caught residents by surprise, many of whom fled as fast as possible, only to find themselves stuck in traffic jams while flames approached. John Vaillant, an author and expert on wildfires, noted that the situation sent shockwaves through the country: “If Halifax can burn, any place can burn, and that blows all our minds.”​

Area in Canada burned in wildfires by year

Many people received evacuation orders without much warning, needing to pick and choose what they took and what they might never see again. In these cases, having a stocked emergency kit can bring a lot of peace of mind. Keeping copies of important documents, family photos (usually on a USB stick), and changes of clothes already packed and ready to go saves a lot of time.

Having emergency food and water with you when you evacuate is wise too. Evacuations can cause traffic jams and jam-packed reception centres. Having something to eat and drink during these hours’ long waits can be a major relief.

The Toll of Wildfire SmokeEmpire State Building barely visible through smoke June 7 2023

While the wildfires themselves posed immediate threats to communities, the secondary effect of smoke was far-reaching. In Quebec, over 700 fires ignited in the summer of 2023, burning more land than had ever been recorded in the province’s history. The smoke generated by these fires didn’t just affect local communities; it traveled hundreds of kilometers, shrouding cities like Toronto and Montreal in thick, hazardous clouds. Air quality levels in Toronto ranked among the worst globally in early June, with residents advised to stay indoors due to the risks of respiratory issues​.

Residents were warned to limit outdoor activity, underscoring how even when far from the flames, preparedness is key. Those with respiratory issues especially needed to limit trips – even for necessities. Having supplies on hand, especially emergency food, can be a great way to ensure you always have a meal, even when sheltering in place.

Flooding and Infrastructure Disruptions

In July 2023, Nova Scotia faced an atmospheric river event that brought more than 250 mm of rain in less than 24 hours. The resulting floods washed out roads, damaged homes, and caused the loss of life. Over $170 million in insured damage was reported, and more than 80,000 people lost power. Significant infrastructure damage, including the destruction of bridges, made it dangerous for residents to move around, prompting authorities to issue stay-at-home warnings. This event demonstrated the necessity of being prepared to shelter in place with supplies, as damaged infrastructure cut off essential services for days. The flooding highlighted the unpredictable nature of climate events and the critical need for emergency food, water, and first aid​.

During the summer of 2024, Ontario experienced record rainfall and flash floods that caused over $1 billion in insured damage. A July flash flood partially shut down the Don Valley Expressway in Toronto and submerged neighborhoods. The damage extended to Mississauga and Etobicoke during an August thunderstorm that left hundreds of homes flooded. The extent of the flooding led to days-long recovery efforts, with many residents either evacuating or being forced to stay home due to damaged infrastructure. As in the Nova Scotia floods, residents who had emergency kits with food, water, and medical supplies were better able to cope with the uncertainty and disruptions caused by these floods.

The Role of Emergency Preparedness

In the wake of these crises, Canadian authorities, including the federal government, emphasized the need for improved preparedness. The Government Operations Centre reported coordinating over 230 requests for federal assistance between January 2020 and August 2023—an unprecedented level of emergency response coordination. Communities across Canada, especially those in rural or high-risk areas, were encouraged to bolster their preparedness for future emergencies, from stocking emergency kits to building resilient homes that can withstand fire and flood.

Organizations such as the University of Waterloo’s Intact Centre on Climate Adaptation released reports highlighting how wildfire seasons are lengthening, and storms are increasing in intensity. These reports point to a future where natural disasters like those of 2023 may become more common, further stressing the importance of personal preparedness.

Conclusion

The natural disasters of 2023 serve as a stark reminder that emergencies can strike anywhere and often without warning. Whether it’s wildfires threatening entire cities, flooding isolating communities, or smoke rendering outdoor activity unsafe, the need for preparedness is undeniable. Emergency kits, stocked with essentials like non-perishable food, water, first-aid supplies, and even air filtration devices, are not just for hypothetical scenarios. They are vital tools that help individuals and families weather the storm—literally and figuratively—until help arrives or conditions improve.

For Canadians, the lessons of 2023 are clear: being prepared for emergencies isn’t optional; it’s essential. Whether you’re in a wildfire-prone area, a floodplain, or even a major city, having an emergency plan and the necessary supplies can make all the difference when disaster strikes.