How to Stock Water for an Emergency

HowtoStockWaterforanEmergency A week ago, we talked about the necessity of being prepared to fight flooding as winter descends across Canada. Of course, flooding is not the only natural disaster that is common in our country. Blizzards and earthquakes are also risks we need to prepare for, among others.

With the temperatures dropping, and the rain and snow setting in, it’s such a wonderful time of year to be cozy indoors. Isn’t it amazing to have a warm home to come home to after a long day at work, or running errands in the rain?

If you’re getting ready for hibernation mode and spending more time cuddled up in your favourite chair with your favourite tea and your favourite book or tv show, perhaps consider spending some of this free time going over your stock of supplies—and water particularly.

Water is top priority when it comes to preparing for emergencies.

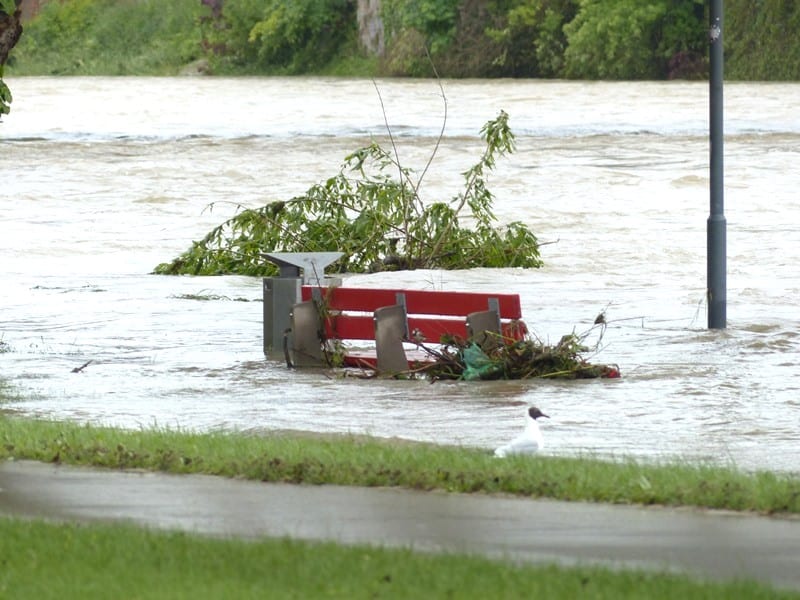
  • If flooding occurs in your home, your water could become contaminated.
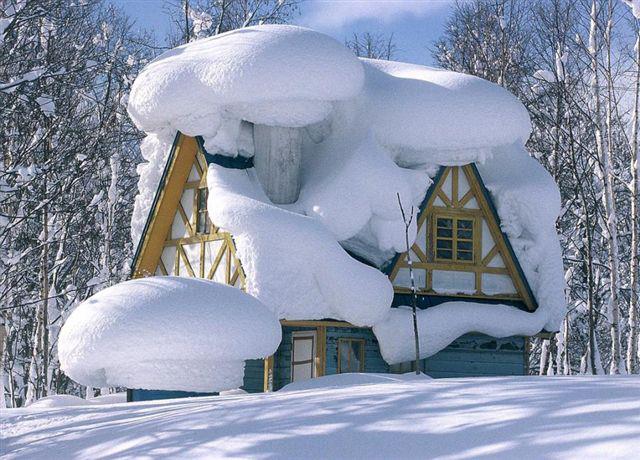
  • If a blizzard or severe storm occurs and you’re unable to leave your home, you might be trapped with frozen water pipes.
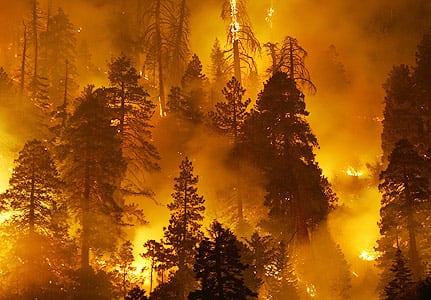
  • If an earthquake occurs, you might have to survive without running water.

Humans can only survive 2 or 3 days without water.

In order to survive for two weeks without running water, you’ll need 28 litres (7 gallons) of water just to stay hydrated and alive. It is recommended that you have 56 litres (14 gallons) because you may need just as much water as you drink, to cook and clean. And that’s just for one person! If you have a family to think about, why not purchase one of our Super Tankers or other water storage containers? This way, you know you’re all covered. By adding a water preserver like Aerobic Oxygen, the water stays potable for up to 5 years, meaning you don’t have to worry about rotating it out as often.

As extra insurance for your family, you may also want to purchase a LifeStraw Family 1.0 if you have a fresh water source nearby. Can you imagine how relieved you’d be if an emergency caught you by surprise and you were able to reassure your loved ones, because you’d thought ahead about their safety?

When you plan ahead for an emergency, you are showing that you know how lucky you are, for what you have, and you want to protect it! For more information on LifeStraw, their products, and what they’re doing to bring clean, safe drinking water to the places that need it most, please check out their new website!


Article contributed by Sophie Wooding – Avid gardener and cyclist in Victoria, BC and Content Writer for Frontier.io

How to Prepare for a Flooding Emergency


As the days get shorter and darker, it’s easy to enjoy the coziness of spending evenings indoors, especially after days spent out in the brisk cold. But it’s less enjoyable to deal with complications, as the rainy season descends and floods become all too common.

Floods are Canada’s most frequent natural disaster. As much as they can happen any time of year, the risk increases during times of heavy and consistent rainfall.

There are also a few other contributing factors:

  • rapid melting of thick snow pack
  • ice jams
  • the failure of a natural or man-made dam

To prevent as much damage as possible, try the following:

  • Put weather protection sealant around basement windows and the base of ground level doors.
  • Purchase flood barriers like Quick Dam’s sandless sandbags or flood barriers, which will absorb up to 32 pounds of freshwater in 5 minutes by forming a gel that blocks water.  
  • If you have a basement, it’s best to install a sump pump.
  • Call your electricity or fuel supplier, and get their advice on how to proceed in the case of a flood.

Plan a to-do list for when a flood is in the forecast, because time will be of the essence!

Make sure you create your own list, based on your living situation, but feel free to use these tips as a starting guideline:

  • Turn off basement furnaces.
  • Turn off outside gas valves.
  • Protect your heating equipment.
  • Move furniture and electrical appliances to an upper floor.
  • Remove toxic materials from the area to avoid pollution.
  • Disconnect eavestroughs if they are attached to the house sewer.
  • Plug basement sewer drains and toilet connections with wooden stoppers.
  • If it’s necessary to evacuate your home, make sure you only return to it once the authorities have said it’s safe to do so.

For more information on what to do once the flood is upon you, read up on safety procedures here!


Article contributed by Sophie Wooding – Avid gardener and cyclist in Victoria, BC and Content Writer for Frontier.io

How to Protect your Home against a Forest Fire

If you’re experiencing a long, hot and dry summer in your area and keep hearing of forest fires close enough to cause concern, it’s a good idea to fortify your house as much as you can. We recently talked about preparing to evacuate, and this is an extension of that.

In the big picture, many ways to protect your home involve prevention methods such as maintaining any vehicles or equipment that may cause sparks, burning debris properly and extinguishing any fires or burns completely.


Here are 14 steps you can take to increase the chance of your home surviving a wildfire:

  1. Remove all dead plants, grass and weeds.
  2. Remove dead or dry leaves and pine needles from your yard, roof, and rain gutters.
  3. Trim trees regularly to keep branches a minimum of 10 feet from other trees.
  4. Remove dead branches that hang over your roof. And keep branches at least 10 feet away from your chimney.
  5. Relocate exposed woodpiles further away from the house unless they are completely covered in a fire resistant material.
  6. Remove or prune flammable plants and shrubs near windows.
  7. Remove vegetation and items that could catch fire from around and under decks.
  8. Create a separation between trees, shrubs and items that could catch fire, such as patio furniture, swing sets, etc.
  9. Cut or mow annual grass down to maximum height of 4 inches.
  10. Create horizontal spacing between trees and shrubs.
  11. Create vertical spacing between grass, shrubs and trees.
  12. Remove fallen leaves, needles, twigs, bark, cones and small branches. However, they may be permitted to a depth of 4 inches if erosion control is an issue.
  13. Mow before 10am, but never when it’s windy or excessively dry.
  14. Protect water quality. Do not clear vegetation near waterways down to bare soil. Vegetation removal can cause soil erosion— especially on steep slopes. In the case that the quality of your drinking water decreases dangerously, it’s a good idea to have a household water purifier on hand, such as our LifeStraw Family 1.0.

As you can see, these home protection steps add up to an entire landscape method. It’s just one part of doing all you can to fight the spread of forest fires across the country. See here for more information on forest fire prevention and a diagram to accompany the steps!

Article contributed by Sophie Wooding – Avid gardener and cyclist in Victoria, BC and Content Writer for Frontier.io

Aftershocks, Part 1: How to Stay Safe

In light of the recent earthquakes in Nepal, we want to talk a little about the ins and outs of survival, once you’ve safely made it through the initial quake. Our hearts and thoughts go out to those who are dealing with the disaster in Nepal right now — those who have been killed, injured, lost loved ones, and those who are still dealing with ongoing trauma.

In earthquake prone areas, such as British Columbia where threat of “the big one” lingers, it’s really important to understand how vulnerable your environment is following a serious earthquake. Aftershocks are often more dangerous than the original earthquake because buildings and structures that are still standing are damaged and still vulnerable to falling.

Take some time to learn, based on knowledge grown through experience, the best practices to follow in the days after an earthquake. The following are a few tips to follow if you’re in a city that has just experienced a quake.

  • Stay alert, and don’t underestimate the power of aftershocks.
  • The rule of thumb, according to trained and experienced Search and Rescue workers, is to keep away from buildings by a distance of about double their height. That’s how far falling debris can reach, if they crumble.
  • Proceed cautiously, avoiding roads, bridges or ramps that may have been damaged by the earthquake.
  • Proceed slowly to a previously designated meeting place, to find your family and loved ones.

For more information on how to respond to earthquakes, take a look at British Columbia government’s Earthquake Response Plan as an example. Take note of the assumptions this plan makes regarding your responsibility:

Individual Responsibility – British Columbia residents should know what to do in an earthquake to protect themselves and their families. All families in earthquake prone areas of the province should have emergency kits, family reunification plans, and the ability to sustain themselves for a period of time until help is available.

So, paired with the importance of knowing the dangers of aftershocks, is the importance of having supplies available to be self-sufficient until your community can be up and running again. We at Total Prepare highly recommend long term emergency food and water as well as survival supplies that will help you do what’s called, shelter-in-place.

If you’d like to read some of the other posts on our blog, try these:

When the snow melts is your house at risk of flooding?

Melting Snow – How to Prevent Flooding in Your Home

Yikes!

Heavy snowfalls have been a regular occurrence this winter, especially for eastern Canada. Even though we are nearing the end of this cold season with warmer weather moving in, warmer conditions can also mean huge snow melts. The more snow you have in your area, the more at risk you may be for flooding and damage to your home.

There are simple precautions one can take in order to decrease the risk that flooding will happen in your home. Spending the time now to get your house ready for the snow melt, could save you a fortune in the long run should your home become affected by water damage.

Here are a few tips to consider when trying to save your house from the potential of snowmelt flooding:

  • Shovel snow away from window wells, gutters, and your house foundation
  • Keep the snow in your own yard, avoid shoveling it into the streets so it doesn’t block drains
  • Try to extend your downspouts by a couple metres to aim them away from your foundation
  • Clear your roof from snow, use precautions or hire a professional
  • Help remove snow and ice from catch basins on your street, they can handle large amounts of water
It is your responsibility as a home owner to reduce the potential of flooding.

One anticipate warmer Spring temperatures melting snow, but if temperatures spike faster than usual the snow will melt accordingly. Remember that maintaining the area around your house is your responsibility as a home owner; if damage is preventable you may not be covered under your house insurance. Be ready and prepare your house for the potential of flooding even if it has never happened before.

Not only can you take preventative measures yourself to help minimize the effects of flooding to your home, there are some amazing products that can also help you keep your house safe and dry. If you have difficulty shoveling around the foundation of your house but want to make sure you are safe from flooding, you need to try Quick Dam. Quick Dam offers both sandless sandbags and sandless flood barriers that will save you time and money and is easy for anyone to use. Place these bags around the perimeter of your house, where you are most worried about flooding, and as the snow melts the water is absorbed and redirected away from your home. There couldn’t be an easier solution to prevent water from seeping into your home!

There are always hazards to be aware of when living in an area where extreme weather is an issue. Taking the proper preventative measures now can ultimately save you time, money, and unnecessary aggravation.

How to Choose Groceries for Long Term Food Storage

When you want to establish a food supply for long-term storage, you must consider a few factors. The food items you choose must be easy to store and store well over the long term. The food must also be easy to prepare and provide nutritional value. Long-term food storage will not be difficult if you follow a few basic tips.

Type of storage:

While a freezer is excellent for storing many foods, it may not be your best choice. Unless you have access to a generator or use solar power, your freezer may not be operational when you need it the most. The best choices for grocery items are those that are canned or well sealed in plastic.

Longevity of food products:

• Low acid canned foods – 2 to 5 years

• High acid canned foods – 1 to 2 years

• Boxed cereal – 6 to 12 months

• Uncooked cereal – 1 year

• Peanut butter – 2 years

• Crackers – 1 year

• Jellies – 2 years

• Dry pasta – 3 years

Honey, rice, sugar and chocolate powder will keep almost indefinitely if stored correctly. Honey may crystallize but it will still be safe. If you doubt the safety of an item, throw it out.

Ease of use:

No matter how long a food item can last, it will not be helpful if you cannot use it. Canned goods should not present a problem as long as you have a can opener. Canned goods with pop-top lids may be a better choice. Items that require heating to higher temperatures can present a problem. While you should arrange for ways to warm your food, exact temperatures may be hard to control.

Choose foods that are pre-cooked or do not require higher heat for use. You can re-hydrate most items with a minimal amount of warmth; it just may take a bit longer. It is extremely important that you consider the additional water needs of dehydrated foods when you are planning items for storage.

Nutritional value:

Soups, nuts and energy bars all provide good nutritional sources. Add in dehydrated or freeze dried fruits and vegetables for variety. Energy or nutritional drinks are also an excellent choice.

When you work on your long-term food storage, date the items as you store them. Rotate these food items into your regular meals to keep your supply fresh. Every six to twelve months you should re-evaluate the types of items you are storing. Your needs may change over time.

Finally, there are options available for pre-packaged long term food supply that offer a 25 year shelf life with good nutritional value that is not only 100% GMO Free but also offer Gluten Free options.


How to Prepare an Emergency Kit

Emergency preparedness is on many people’s minds lately. There have been many natural disasters all over the world in recent years. One of the biggest lessons we can take away from all of these events is that when you are prepared before disaster strikes you will be much better off. All of us should have a few important items on hand at all times to help us get through an emergency. An emergency may be a storm, power outage, earthquake, or some other unexpected event that will cause you to have to survive on your own without the common conveniences that we have every day.


In order to have a quality emergency kit on hand you should fill it with certain items. You should always have a blanket, and extra pair of shoes, a flashlight with extra batteries, bandages, some type of antibiotic cream, water, and food. These are the minimum requirements for an emergency kit. You should have one in the trunk of each of your cars, and one in your home. A good place to store your kit may be in the garage or an outside shed. It is also a good idea to keep the tank of your car at least half full at all times.


Be sure that you check the batteries in your emergency flashlight monthly and replace your battery supply with fresh ones every 3 months or so. You water storage should be refreshed often as well. The same goes for your emergency food storage, be sure that you check the expiration dates on all of the food that you keep in your kit. You should obtain the best quality survival food Canada has to offer.


Many survivalist and experts prefer freeze dried food for their emergency kits. Good quality freeze dried food will maintain its flavor, have a long shelf life, and it is easily stored. Some of the other types of food you may keep in your emergency kit will be bulky and lose its flavor rather quickly in storage. Another reason to buy freeze dried food is that you can purchase a variety of different types of food. Many of these foods have the nutritional information on the package so that you can be sure that you are eating the right nutrients to keep you stronger in an emergency.


You will find survival food available at many different price ranges; do not make your purchase based on price alone. Be sure to check shelf life lengths, weight and serving amounts and nutritional values on the package. Be sure that you sample the food as well, whether you are in an emergency or not you will want to be able to have the best tasting food on hand as possible.